Homemade Butter/ Ghar ka Makhan
Homemade Butter/ Ghar ka Makhan
Butter making is an art and science!
The experience of churning cream to obtain soft, smooth, fresh butter is magical! Born in India, from a young age, it is instilled in us that milk, cream, butter, yogurt, butter milk is essential part of our life, and beneficial for health. While I was growing up, there was only one diet- everyday diet! No one had heard of vegan and gluten free diets and food was essentially what mum cooked everyday home.
My mum would often ask me to help her make butter and showed the miracle of how cream turns into butter. I used to enjoy making butter and eating dollops of fresh butter seasoned with salt and red chilli powder with food. In the everyday hassle of life, I rarely ventured to make it at home until my daughter came home from school and told me of an experiment, she did in school involving milk and cream. She was in awe! Her amazement and delight made me realise that she did not know that butter comes from cream, or how easy it is to make butter at home without any special equipment. I almost kicked myself for not sharing this magic with her earlier!
Butter making at home is definitely a forgotten skill or a skill that most people shy away from- thinking ‘who has the time to make butter at home?’ or ‘too many calories’! Nowadays, butter has to compete with a bewildering variety of spreads. However, I prefer good, honest homemade butter. You know where it comes from and it has no additives, nor does it require any complicated processing.
In India traditionally most households made this kind of fresh butter every few days for their use and we still see glimpses of the tradition in the white dollops topping dal makhani, stuffed paranthas or sarson ka saag. White Makhan or safed makhan as it is called in India is traditionally made using Buffalo’s milk and hence it is white in colour. So, the colour of the butter will hugely depend on the type of milk you use. Goats and Buffalo milk will yield white butter as it does not have beta carotene that causes the yellowish blush in cow milk. A goat or a buffalo turns the carotene present in their fodder into vitamin A, which is colourless. White or yellowish the taste is same!
This recipe is a two for one! Not only do you get super flavourful butter, but you also get fresh buttermilk! Cold buttermilk is a drink that is loved in India, you can also make pancakes, biscuits, or cakes with it!
Indulge in making this delicious butter at home and involve your children!
Ingredients
600 gm double cream/whipping cream
Few ice cubes
Salt to taste (optional)
Directions

There are few methods of making the butter. Either using a stand mixer, a jar with a tight-fitting lid or using a butter churner. I usually use the stand mixer, but I have given the method for jar in the ‘Tips and Variations’ section.
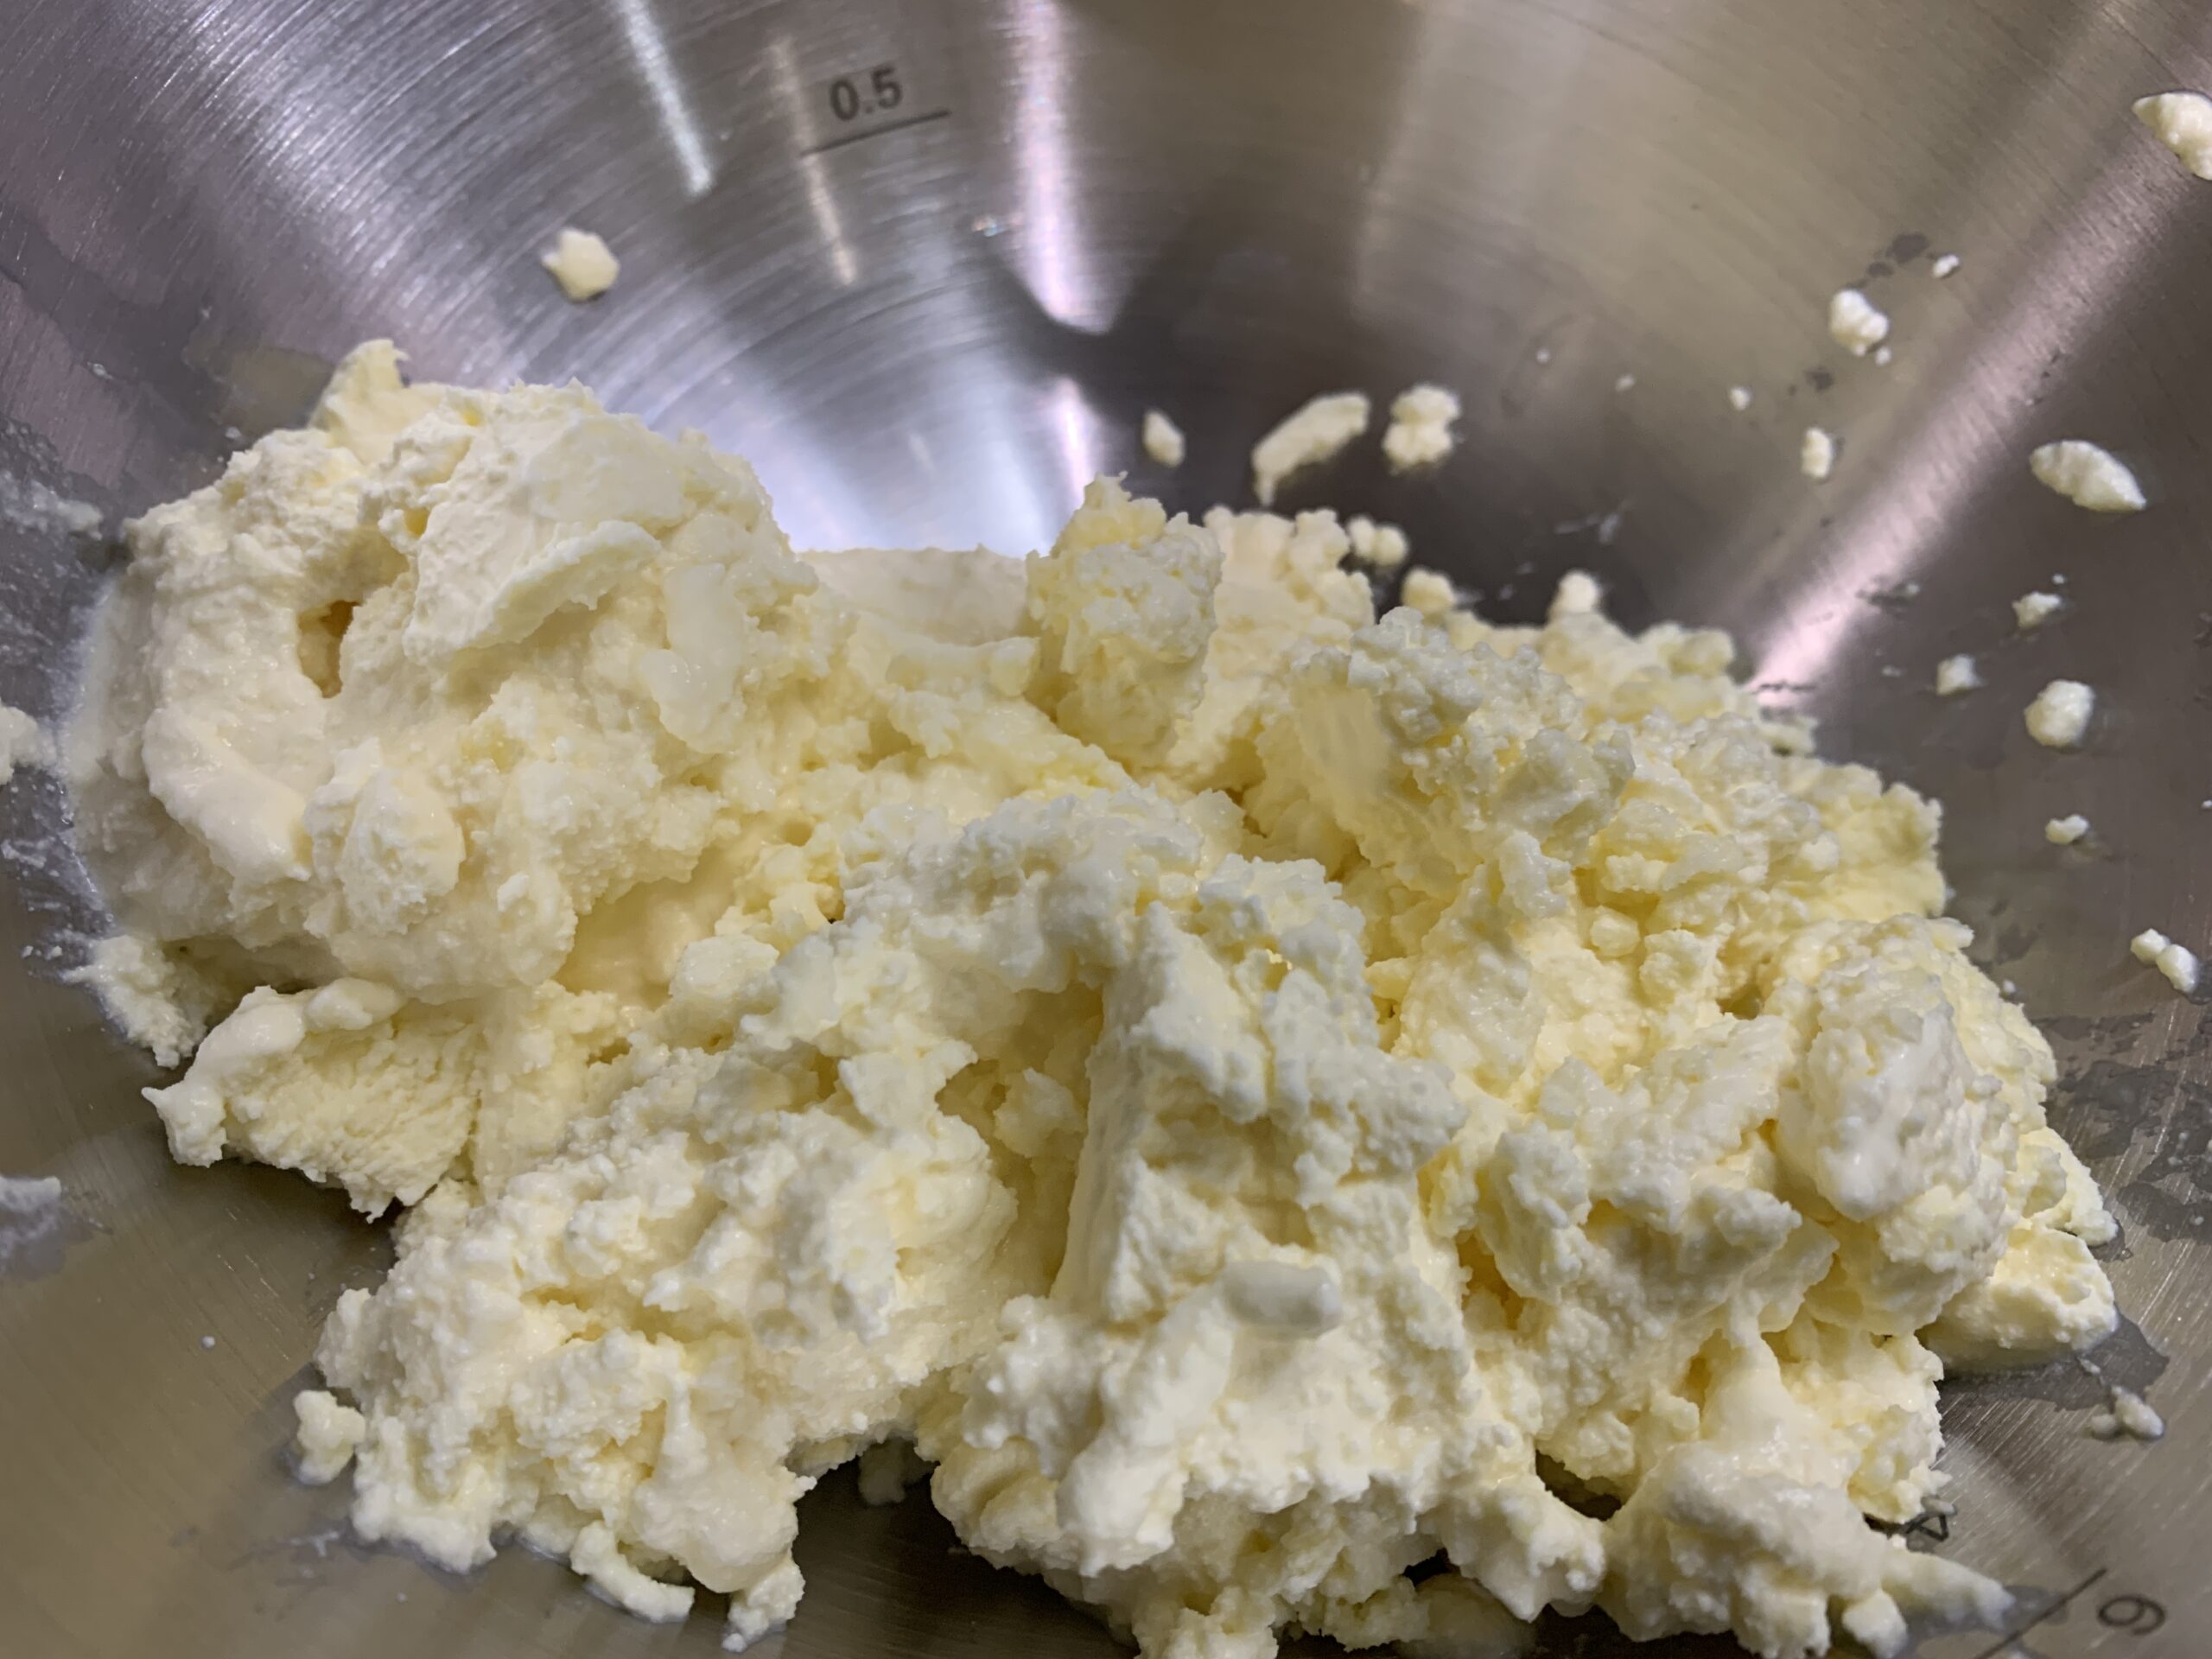
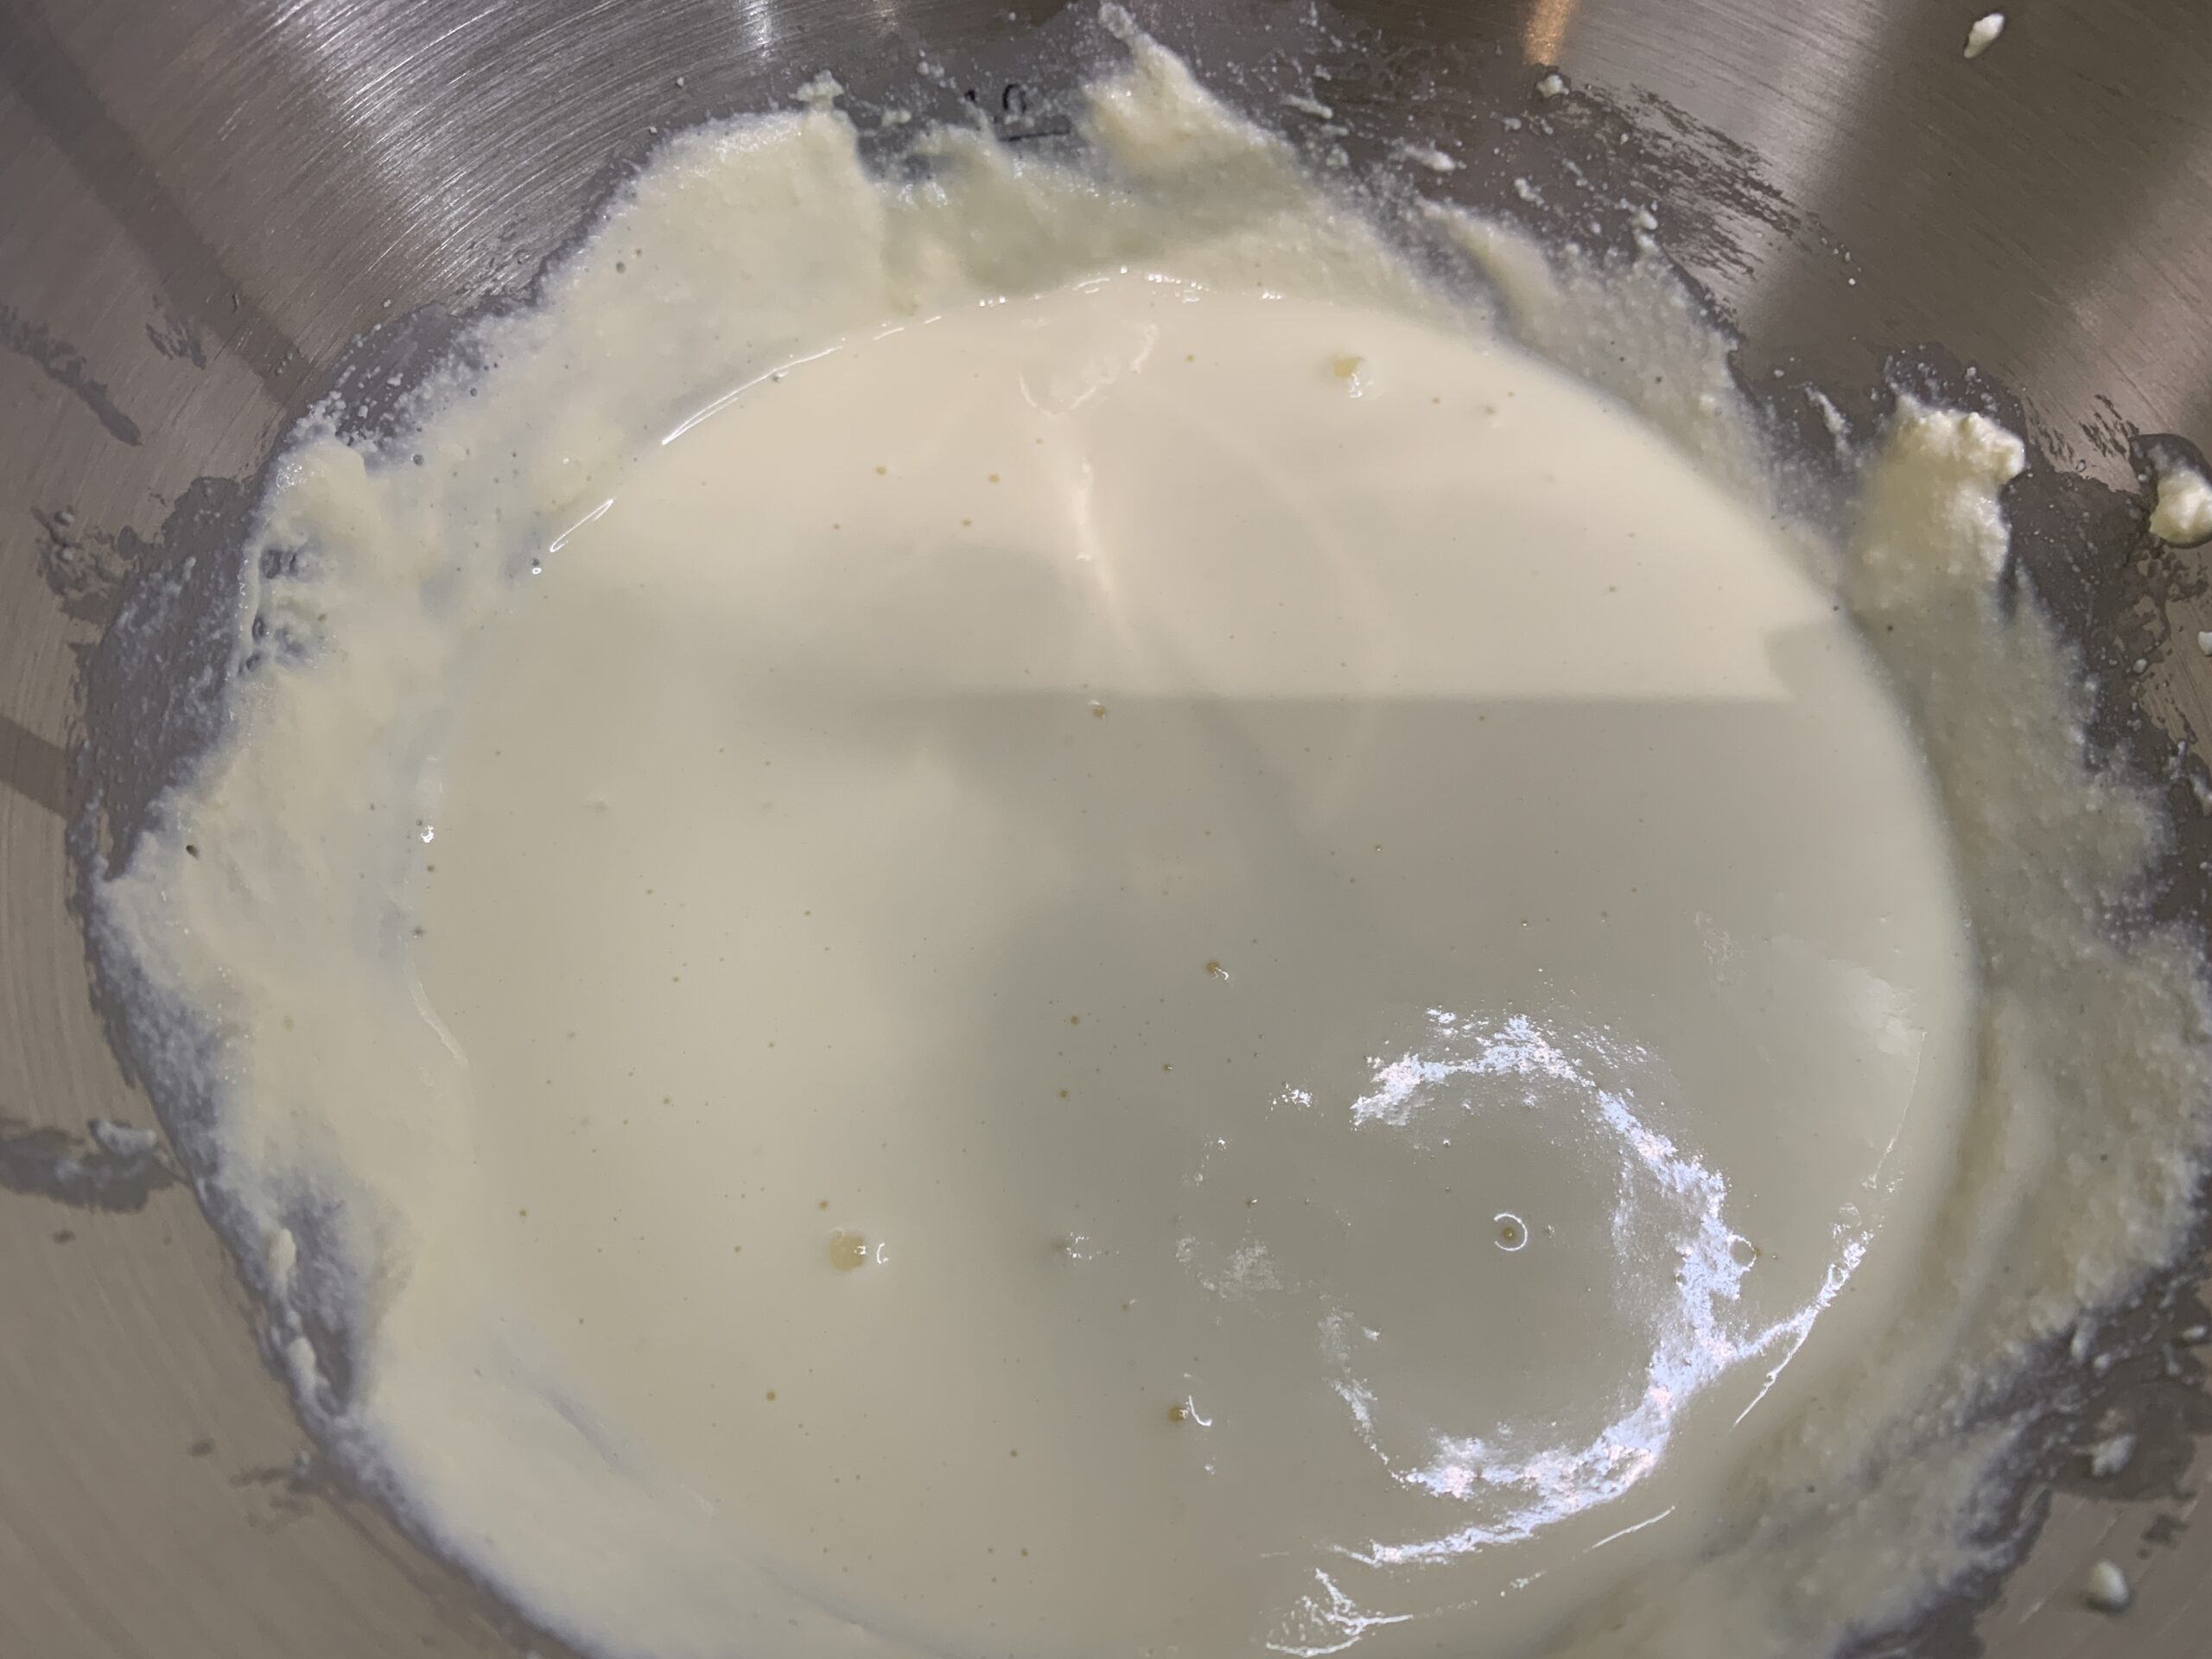
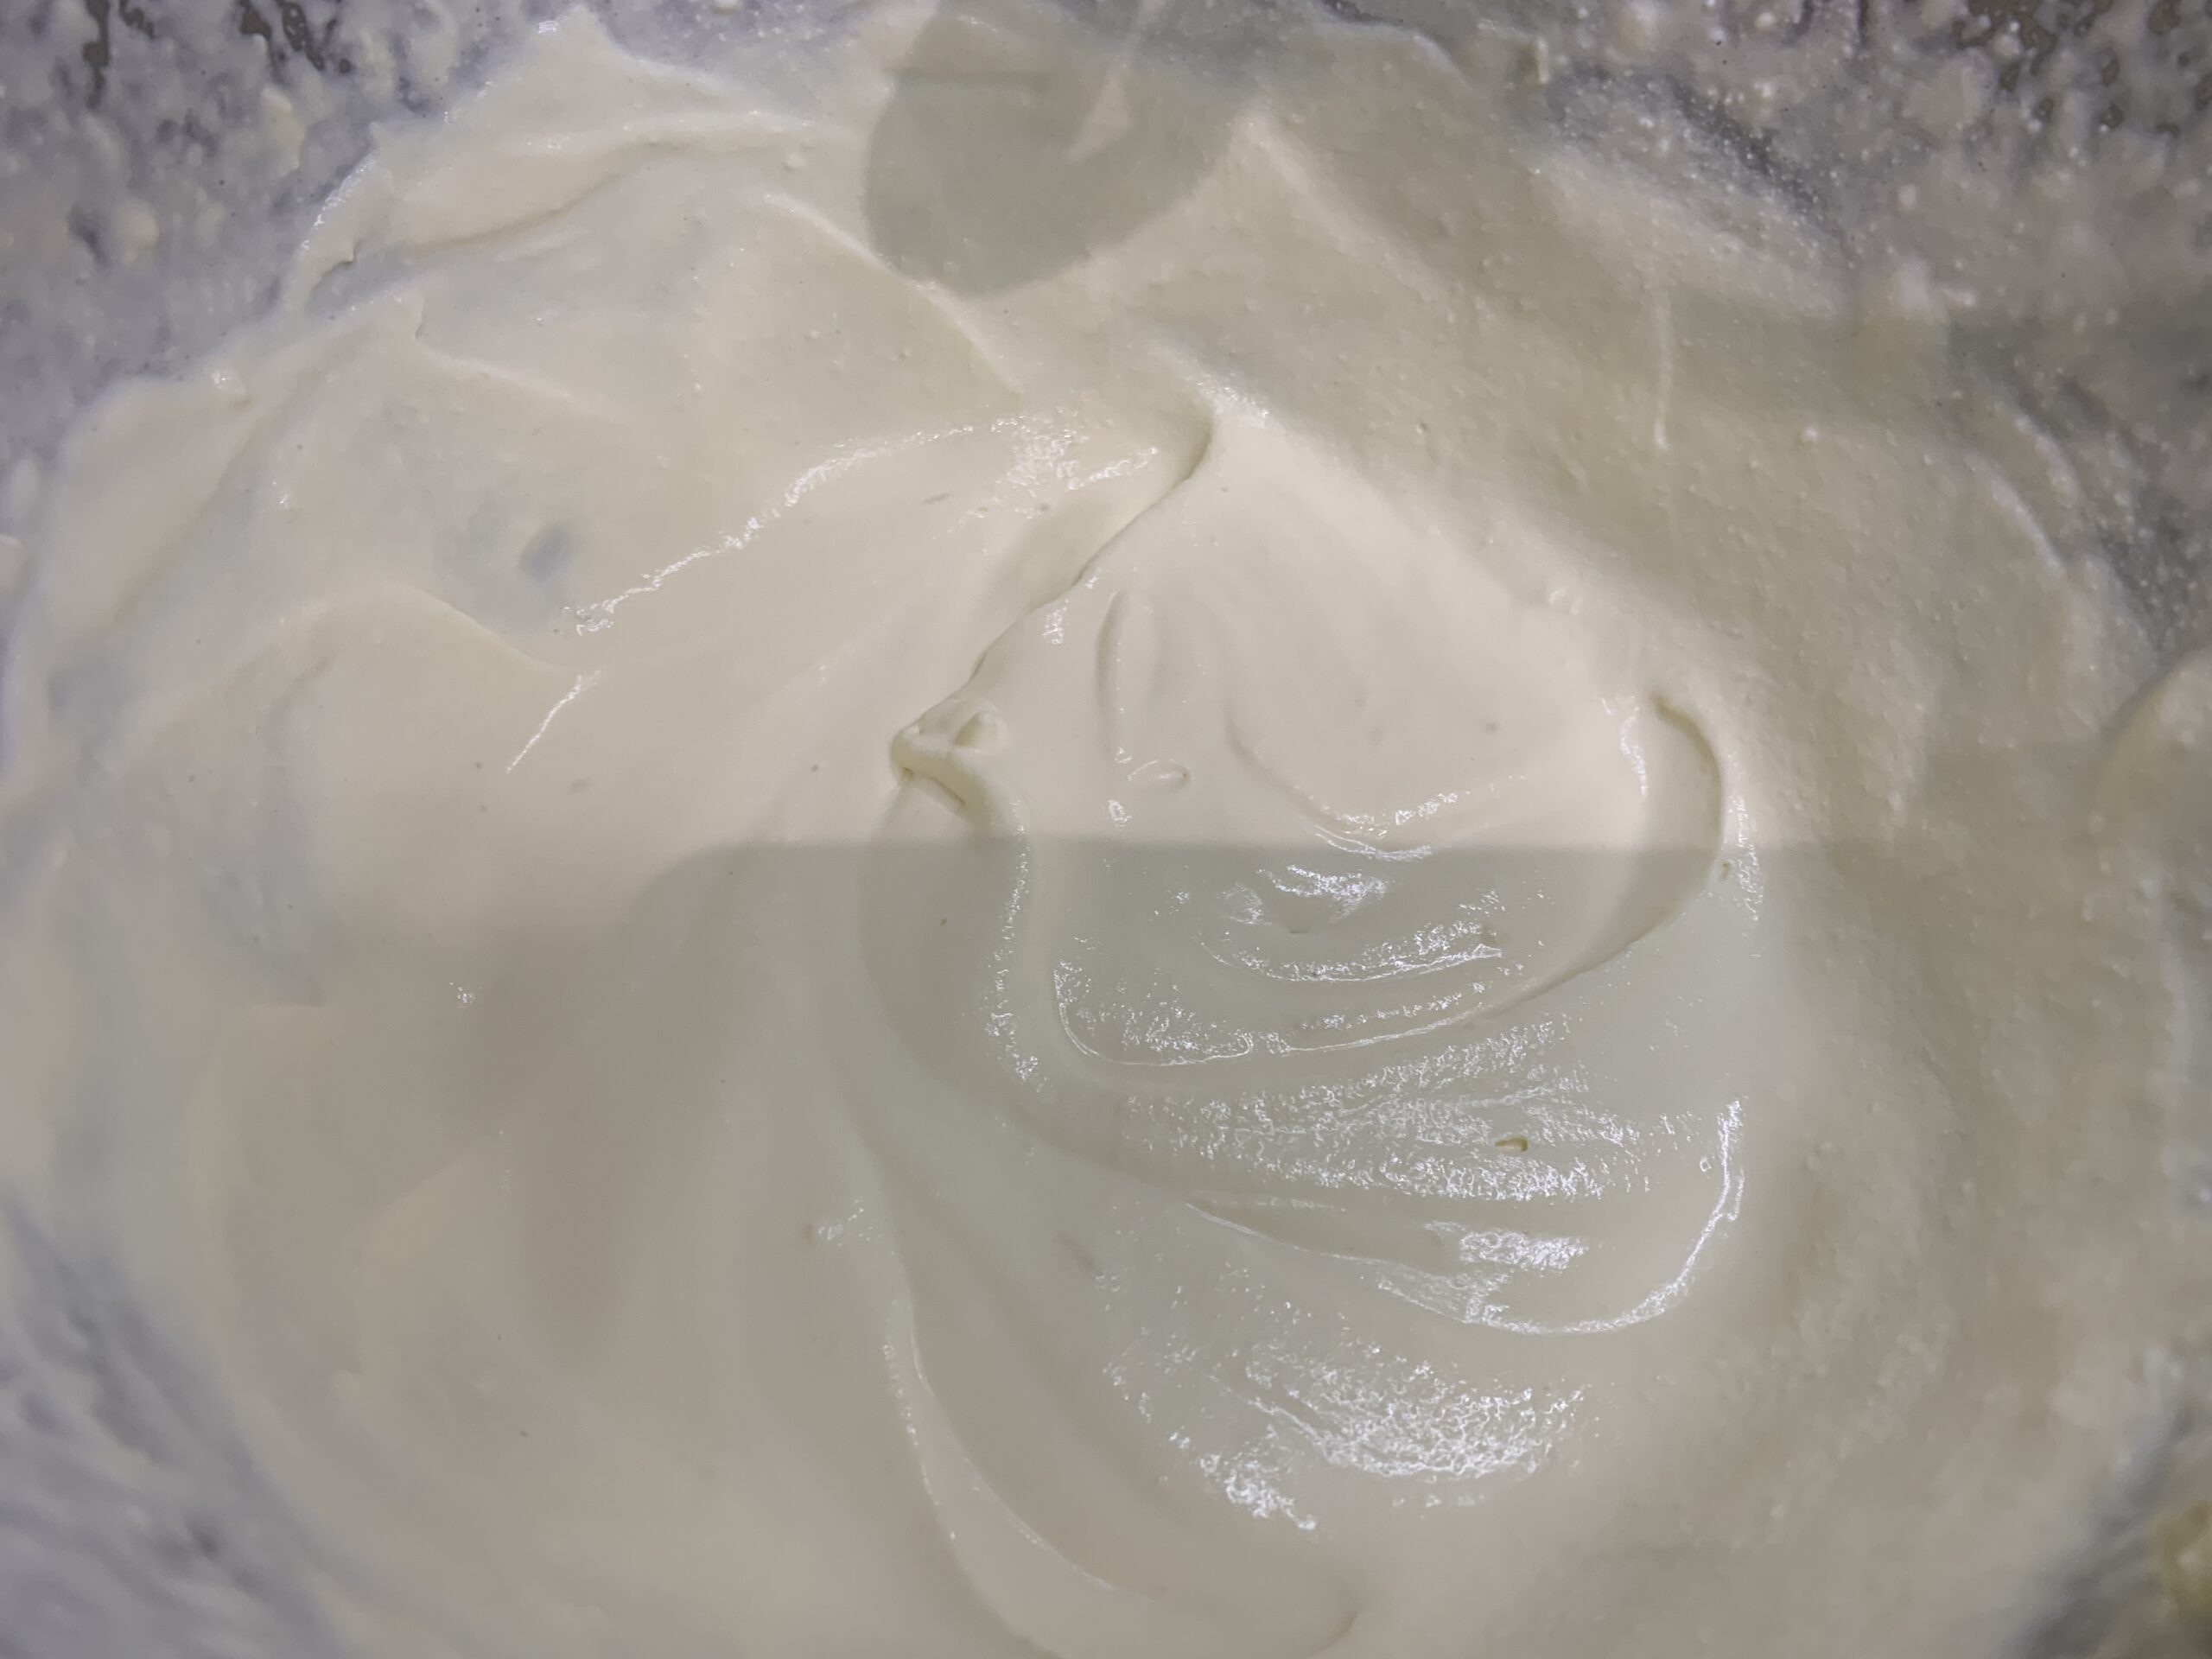
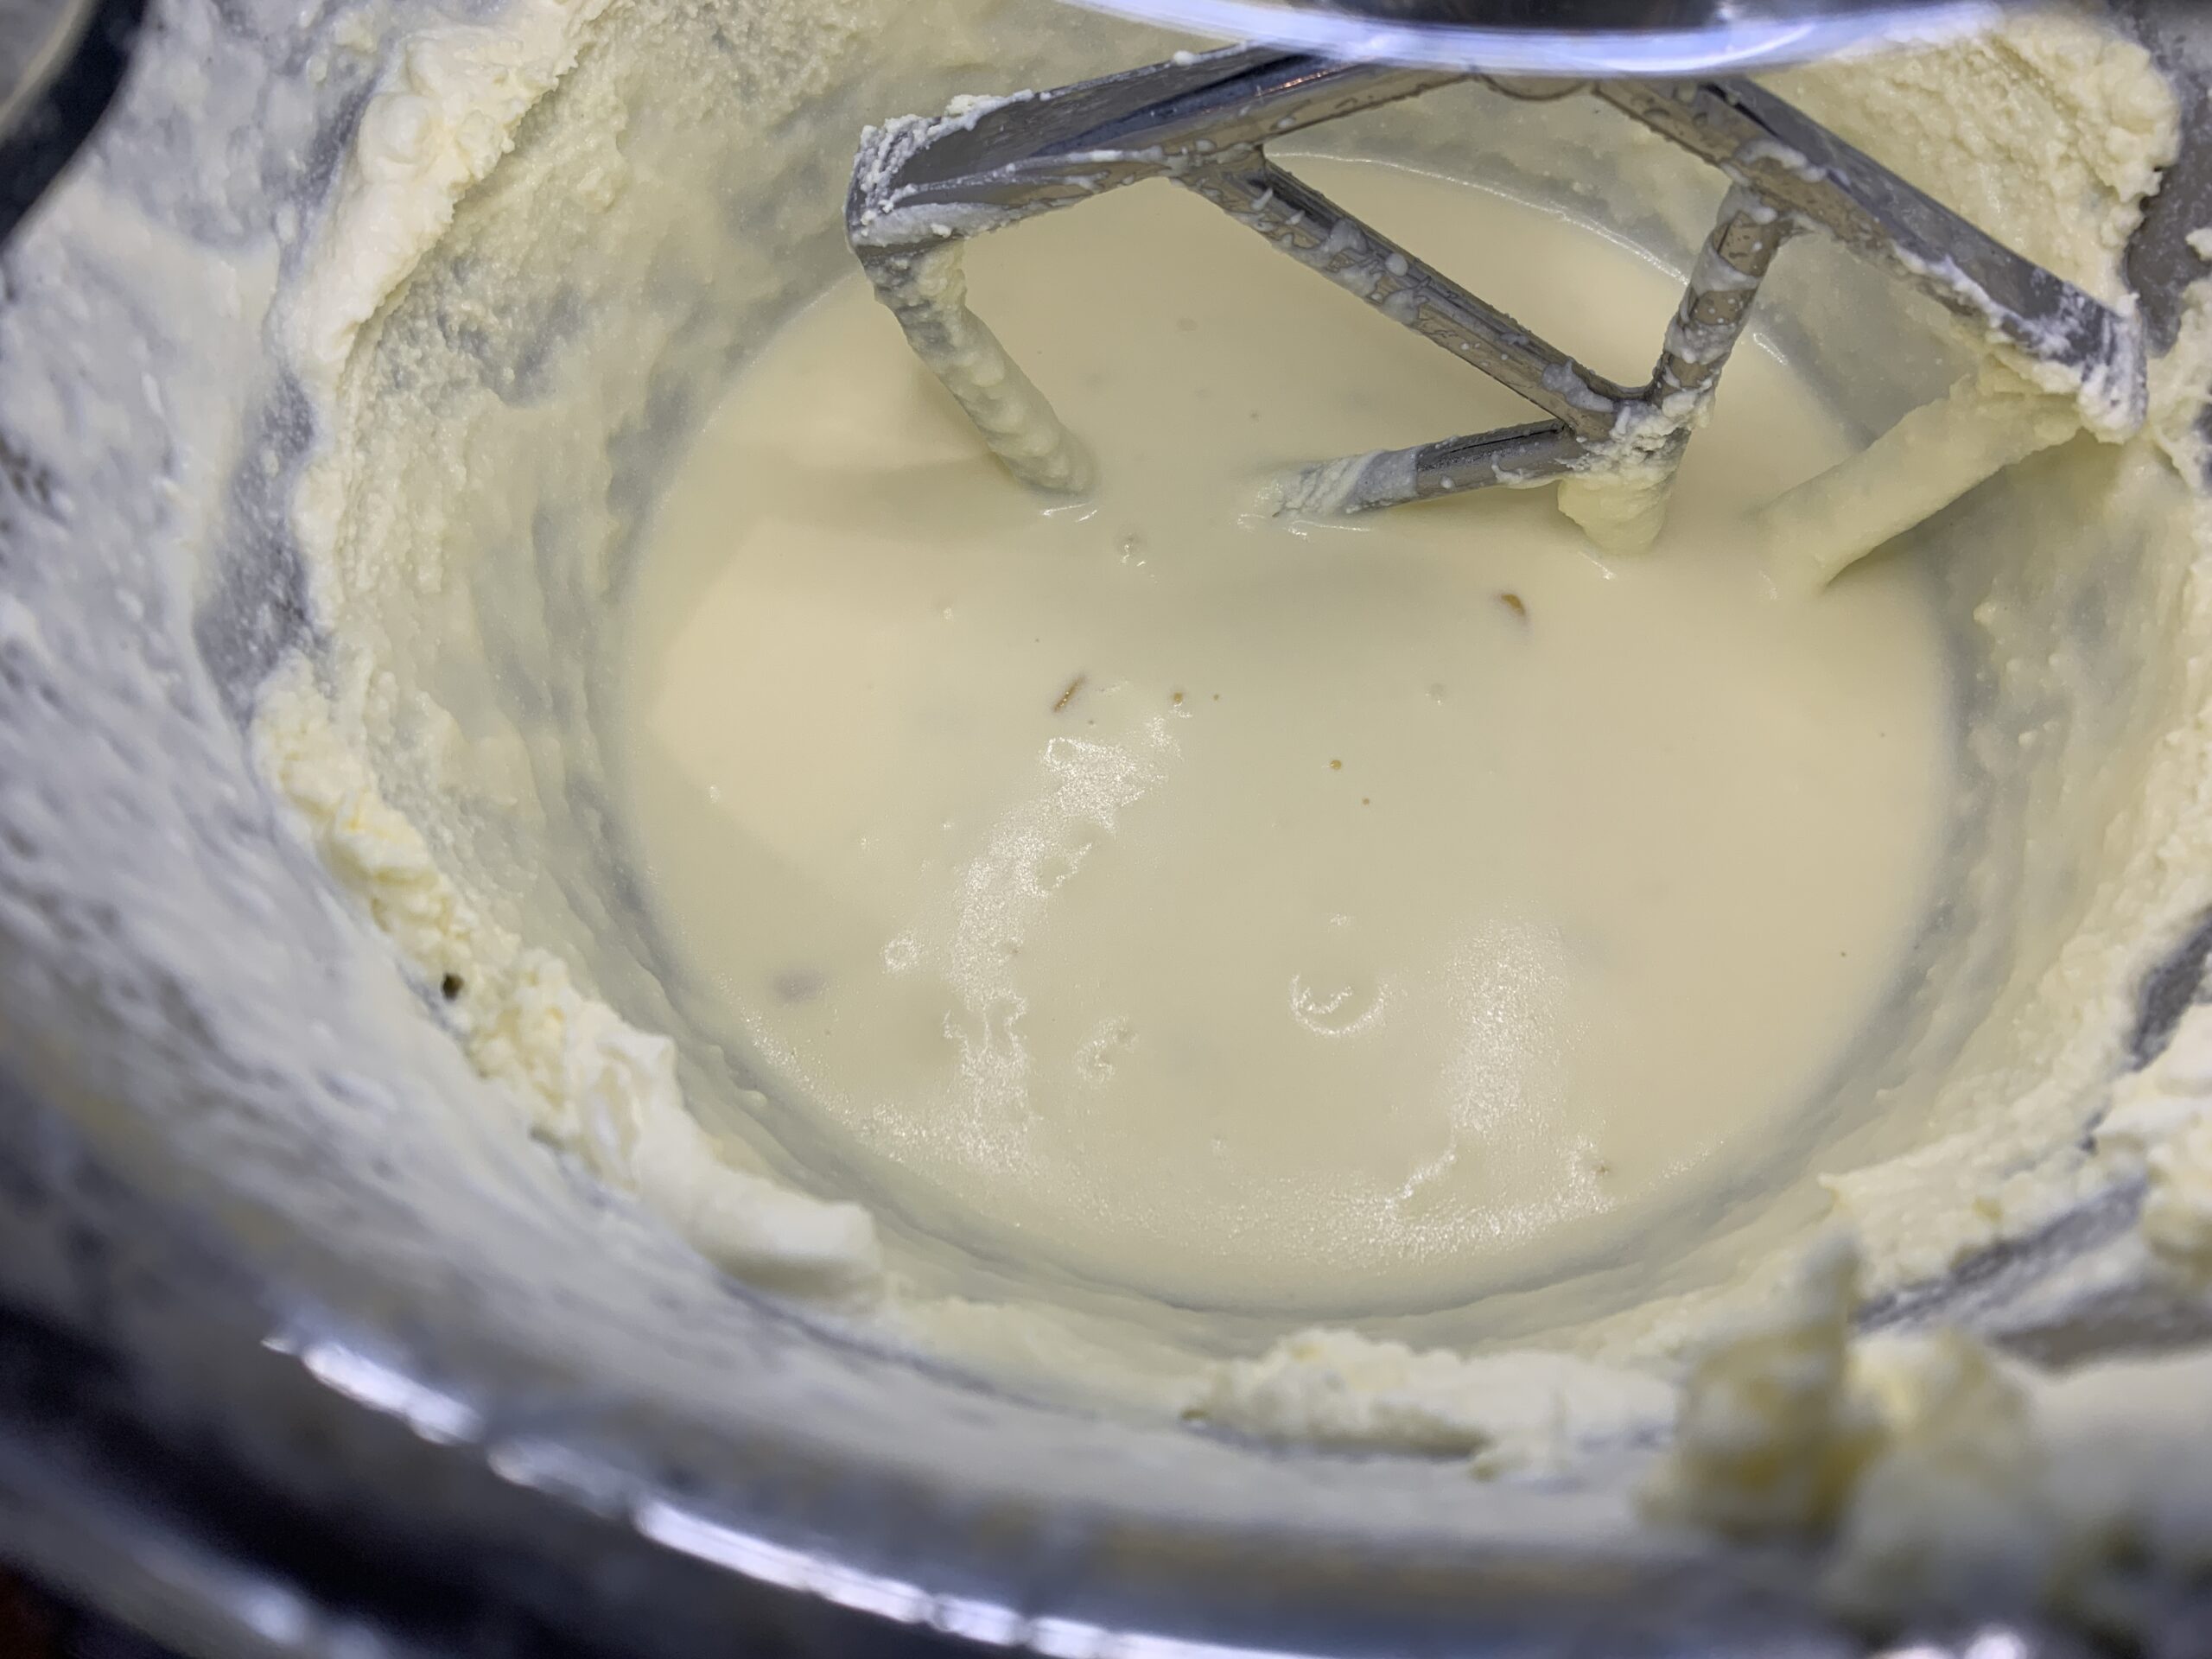
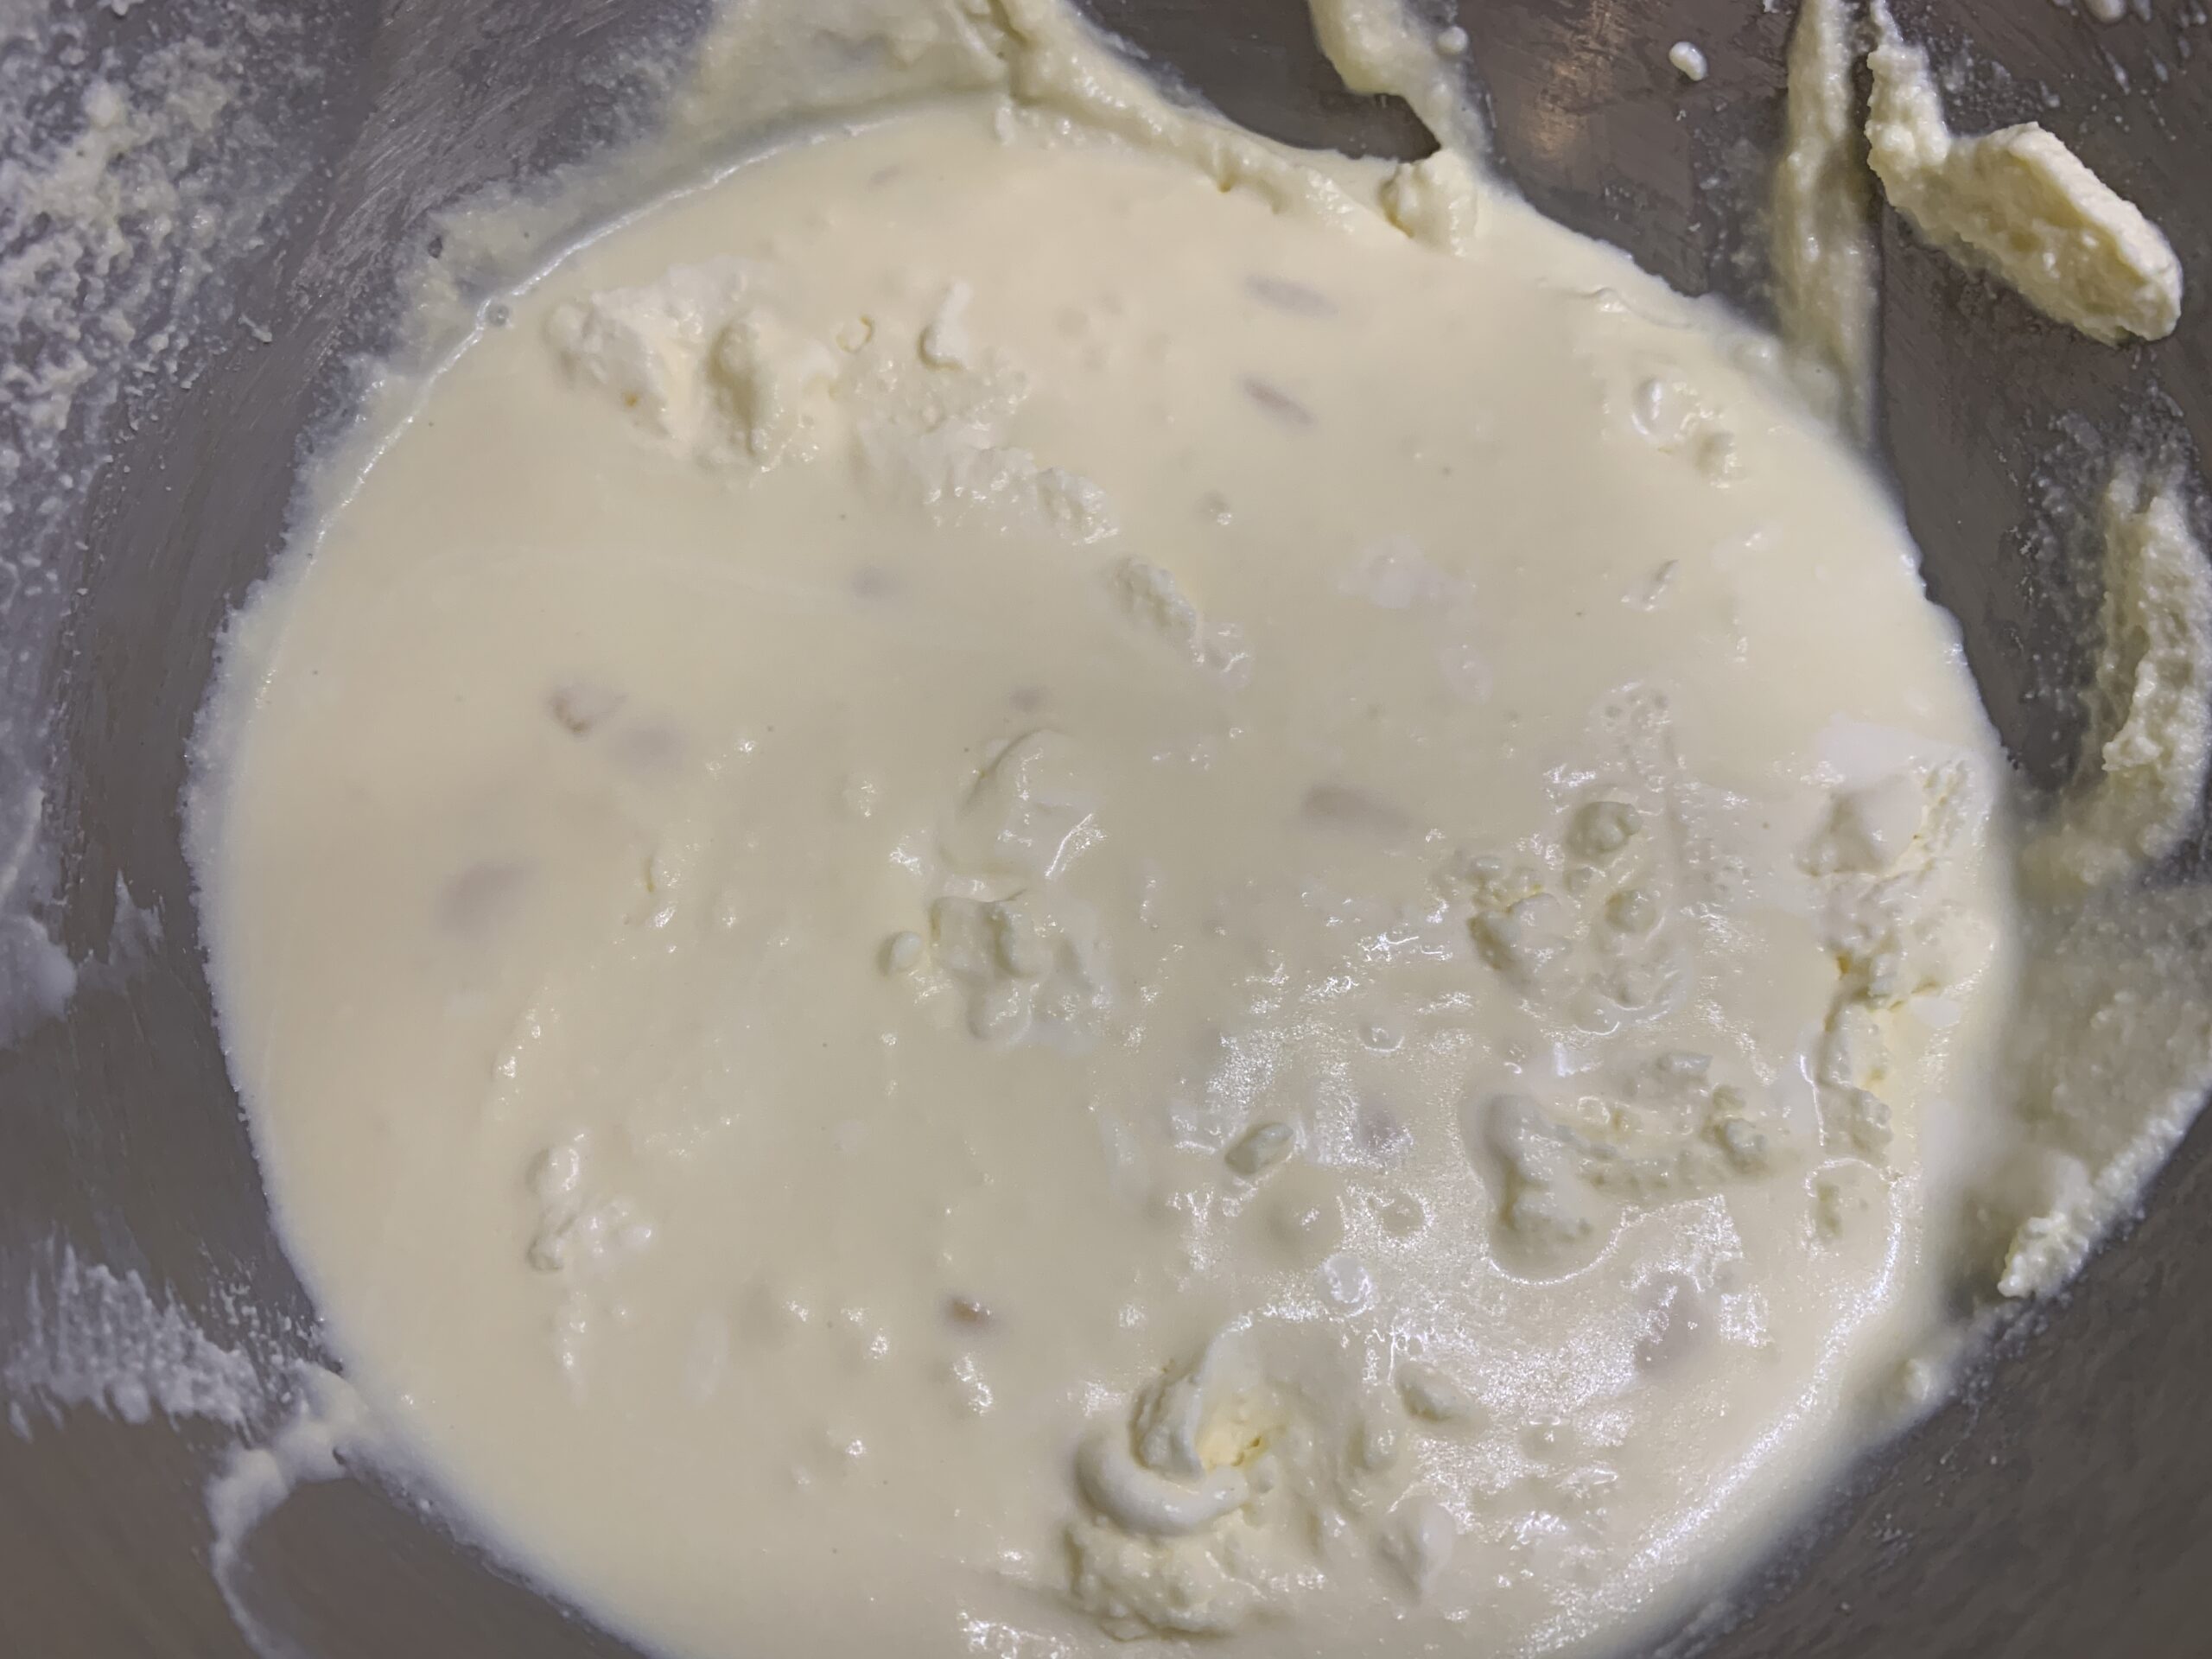
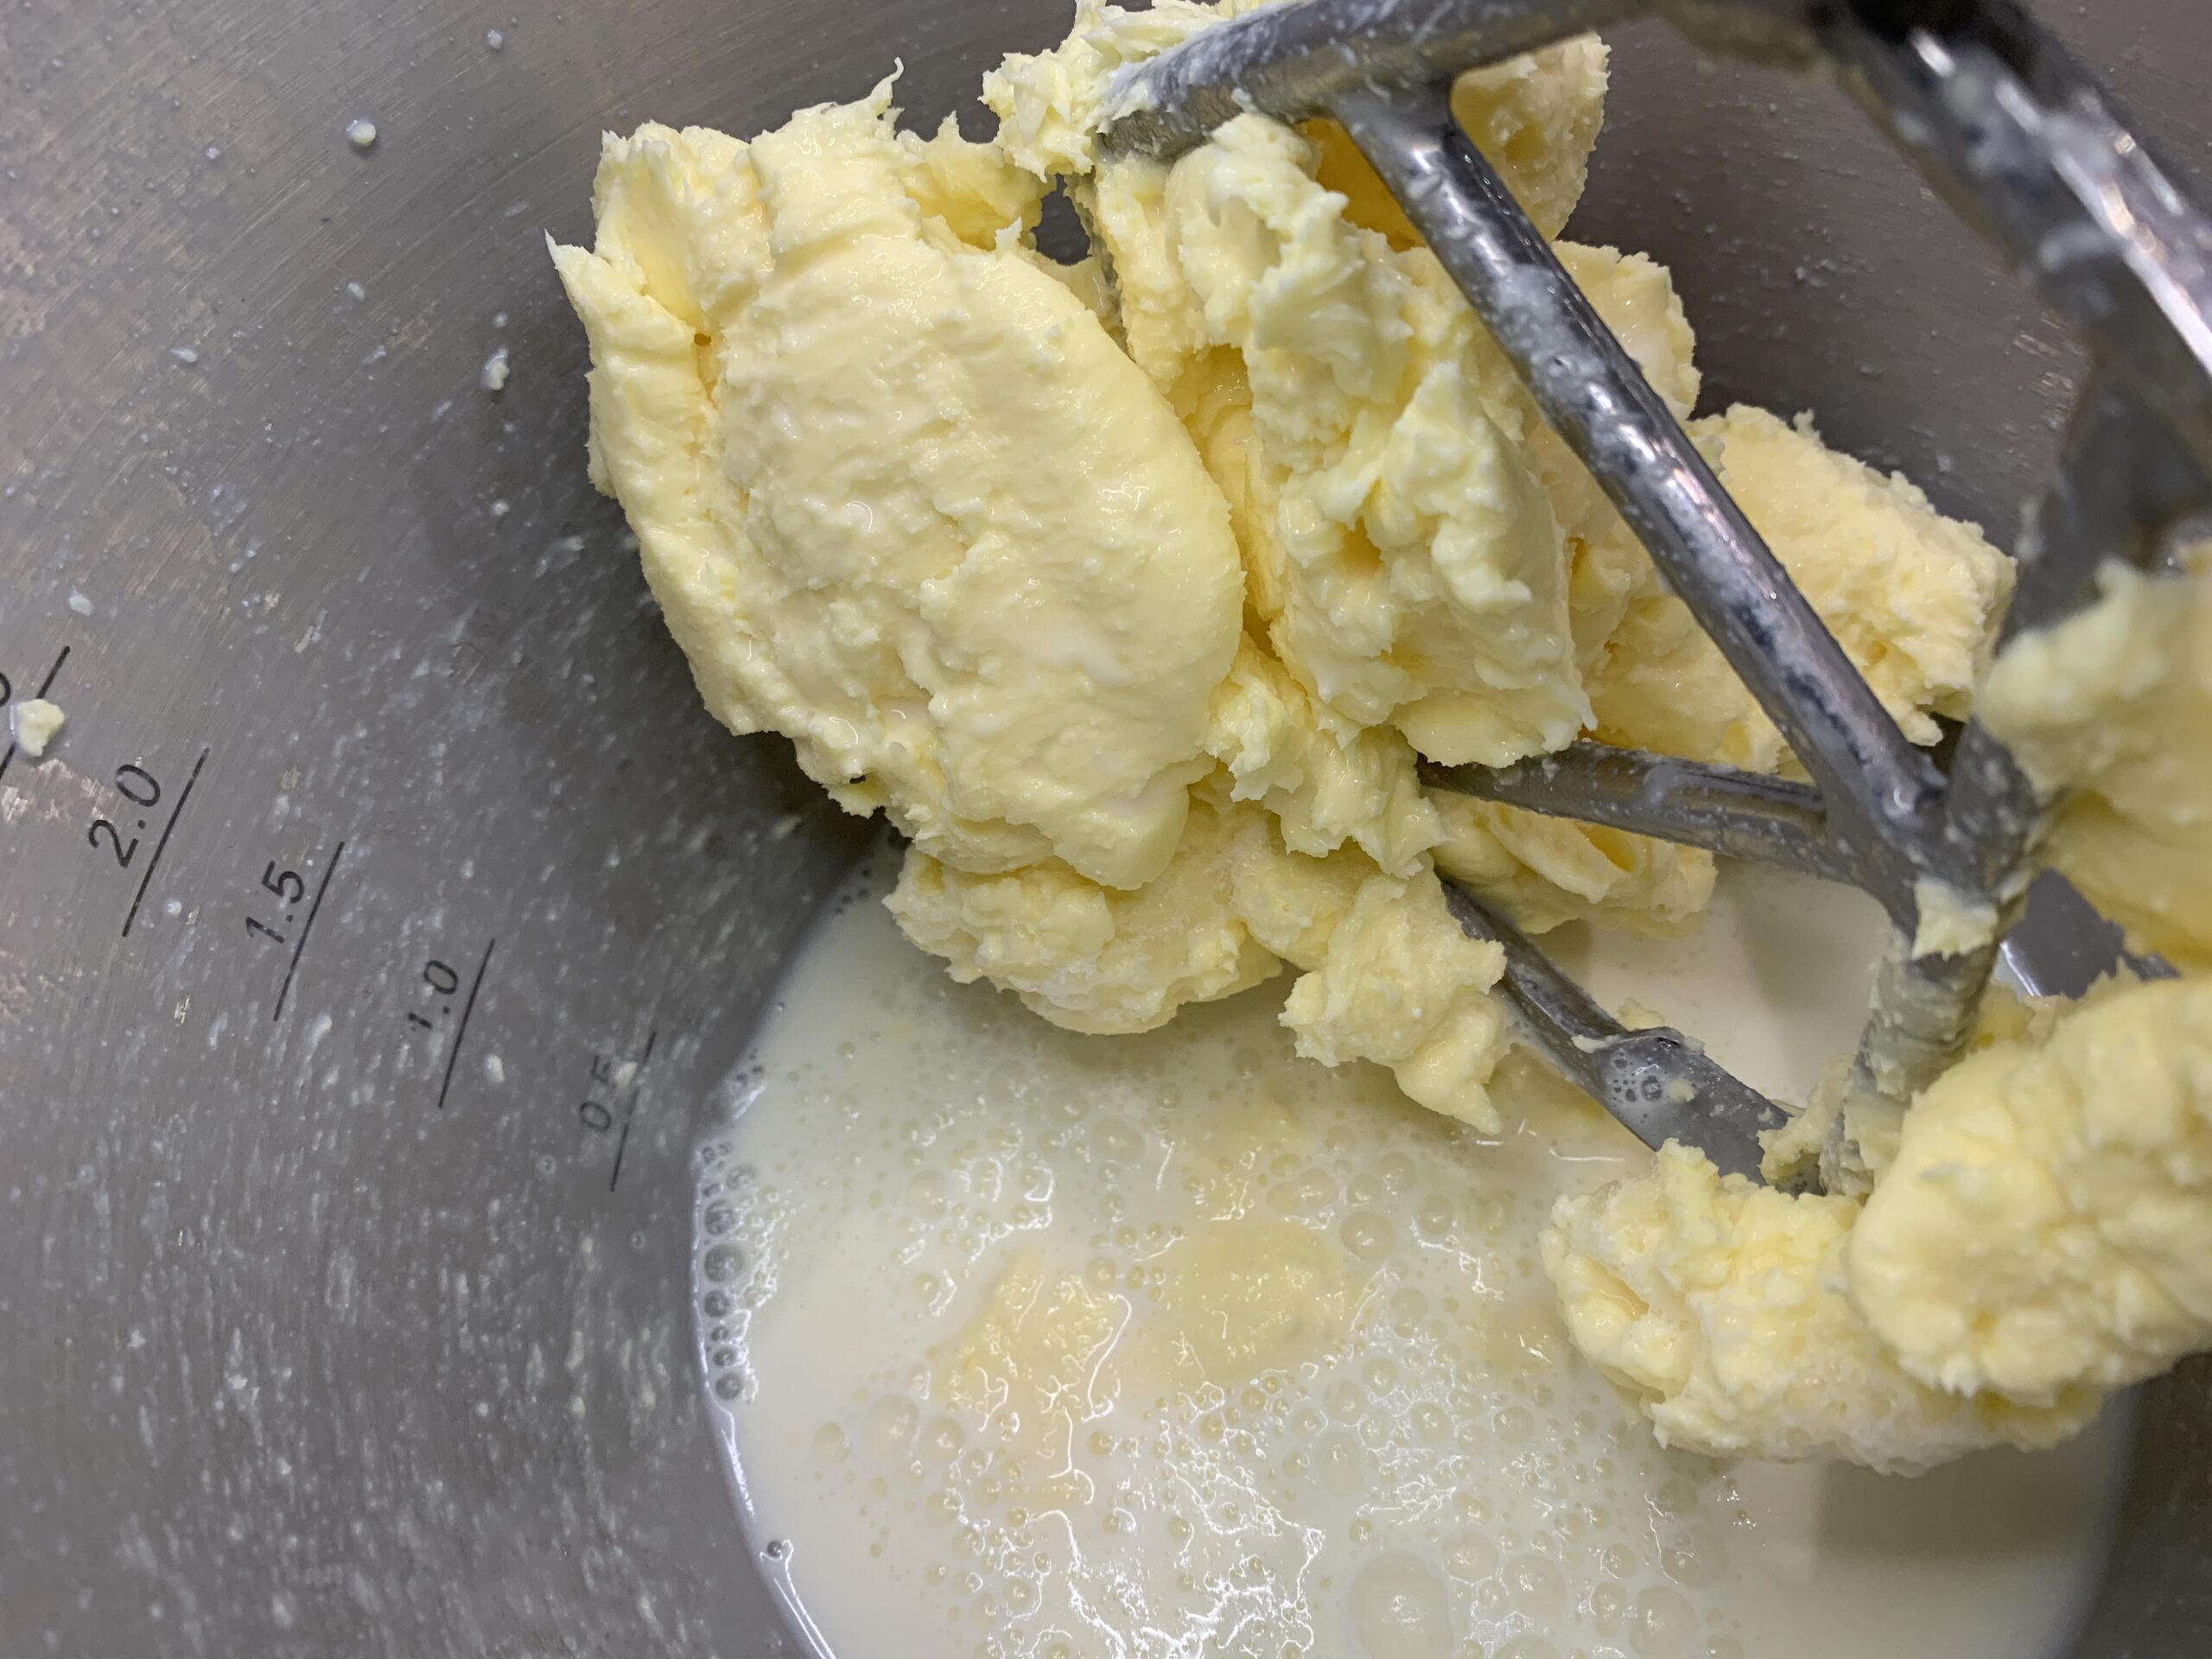
Pour the cold cream in the bowl and turn the machine on low speed and gradually raise to medium speed. After about 3-4 minutes you will notice that the cream will turn into soft whipped cream and then with more beating into stiff peaks. Do not stop! Keep going until the cream breaks and you will notice the butter clinging to the beater. At this point add couple of cubes of ice which helps in separating the butter fully and you will notice more buttermilk. The whole process usually takes anywhere from 10 to 12 minutes. You will see yellow buttery solids and a cloudy liquid at this point.
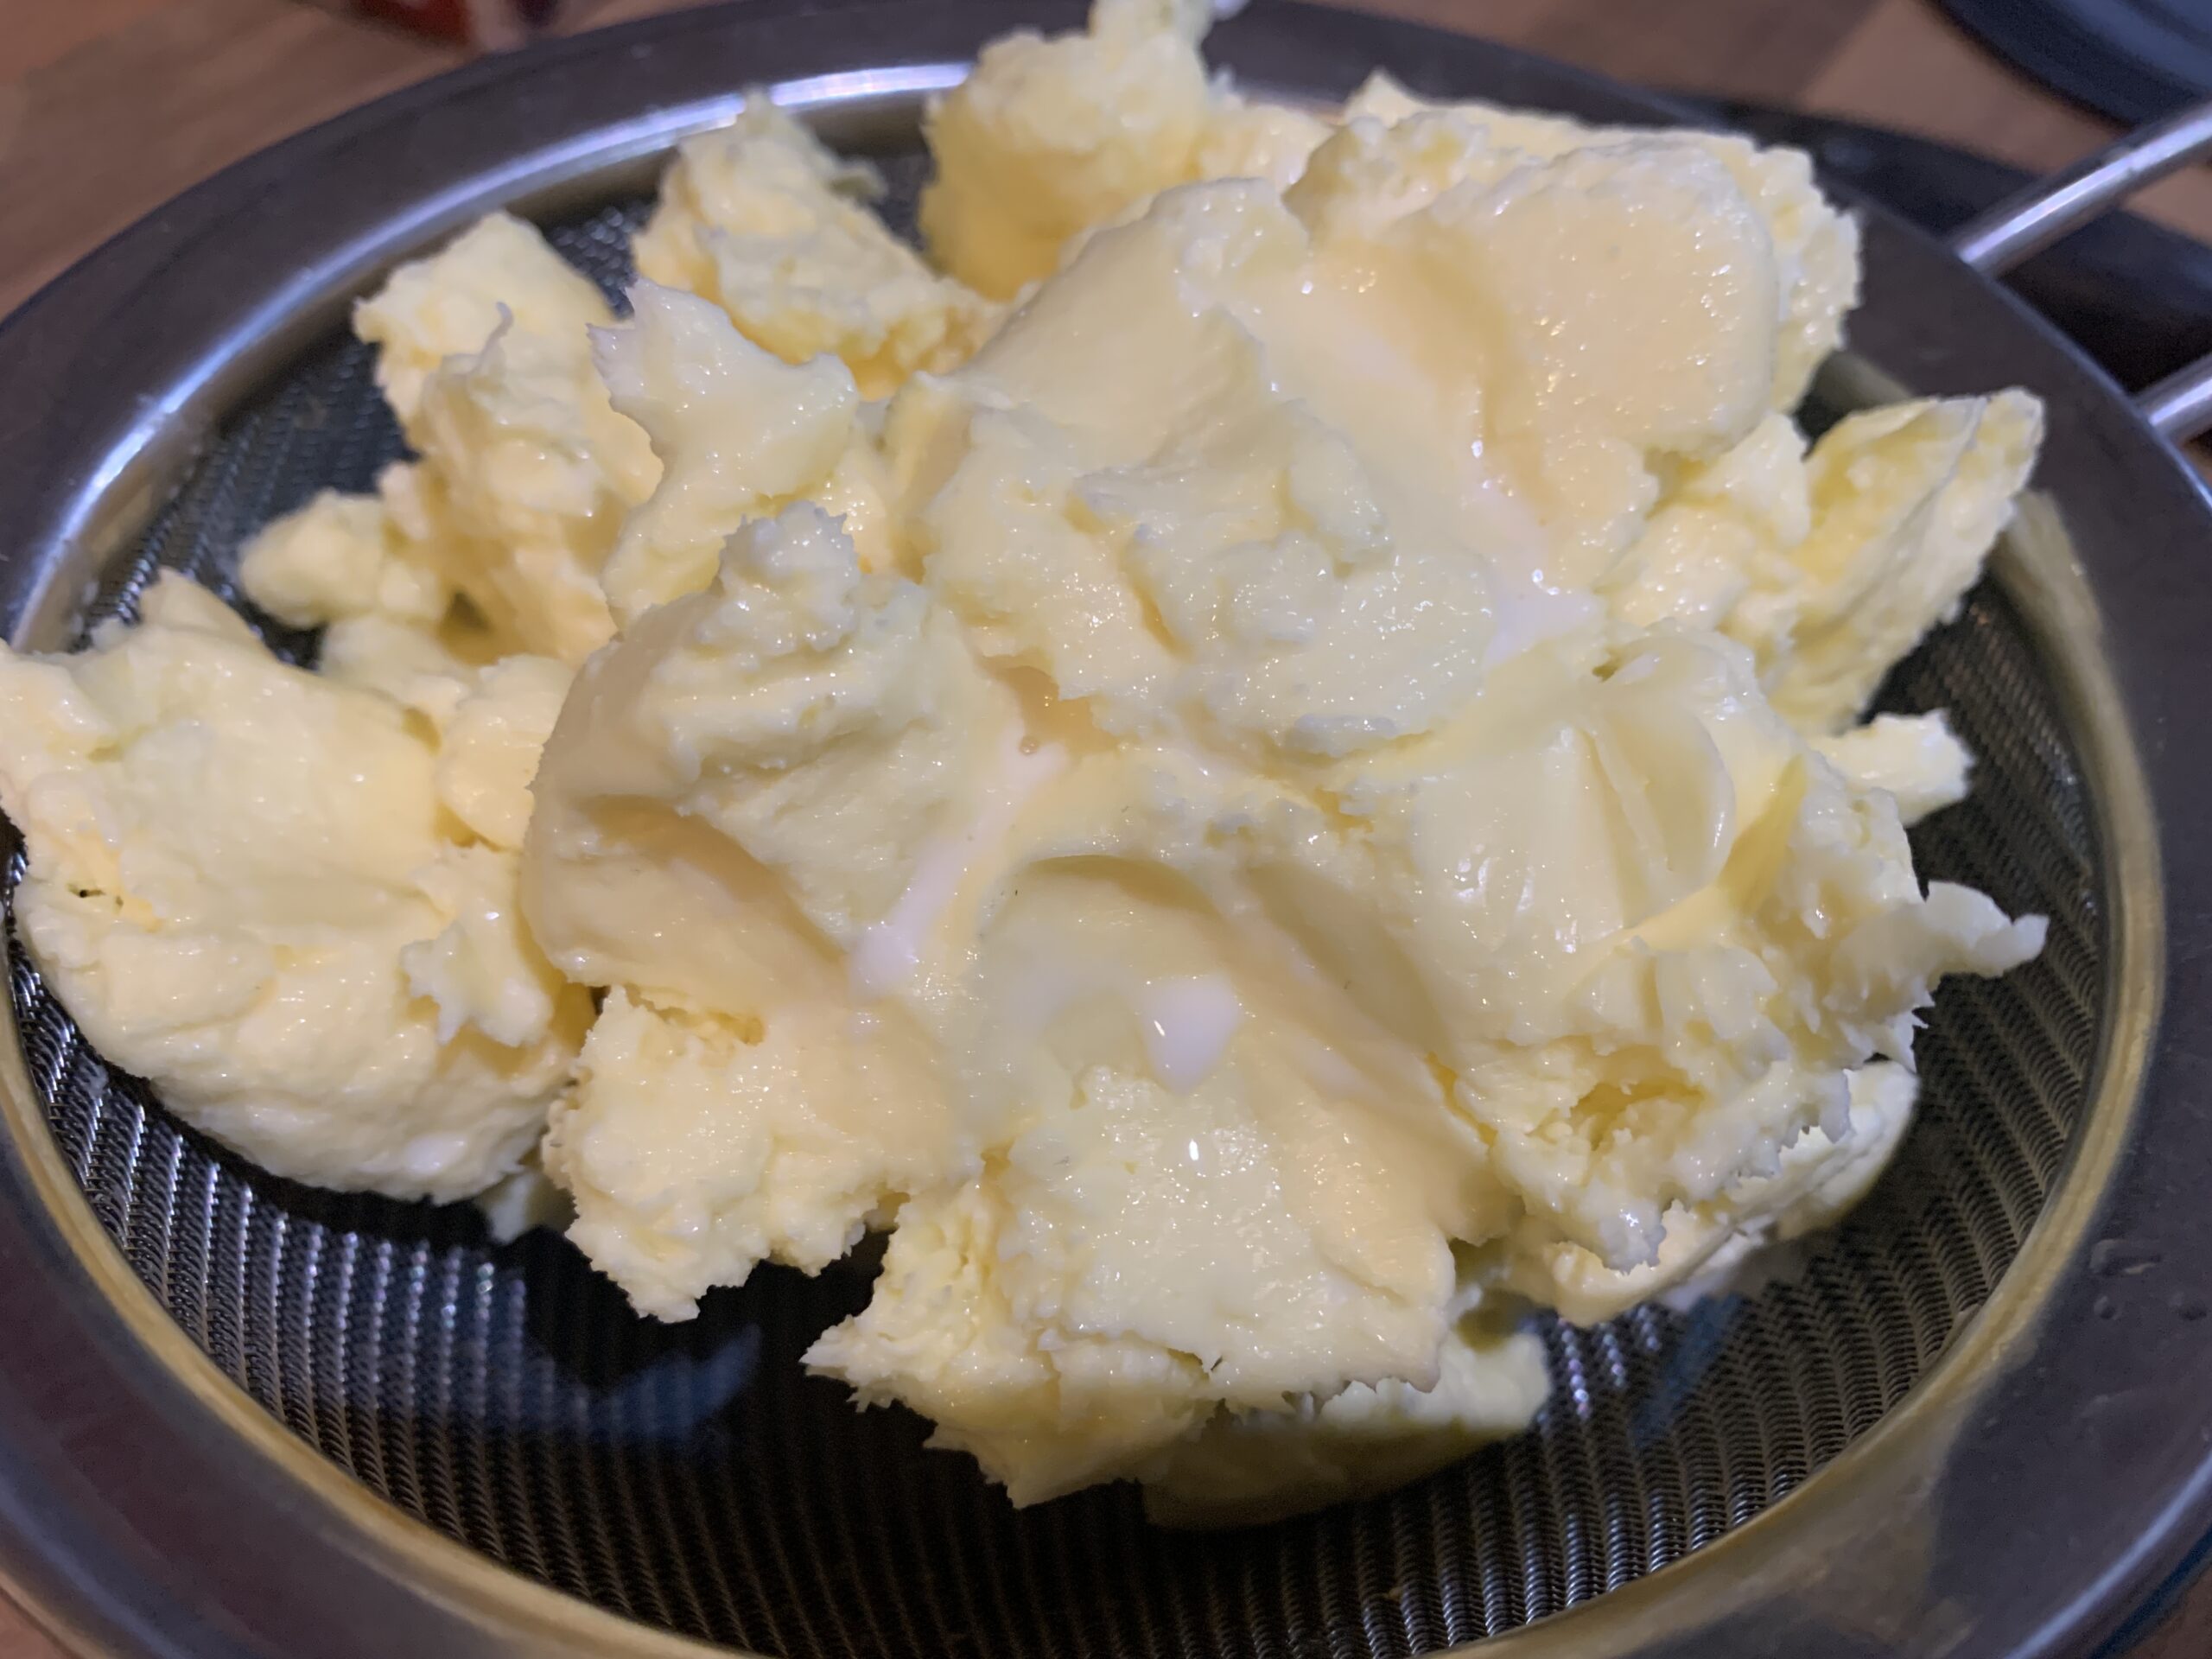

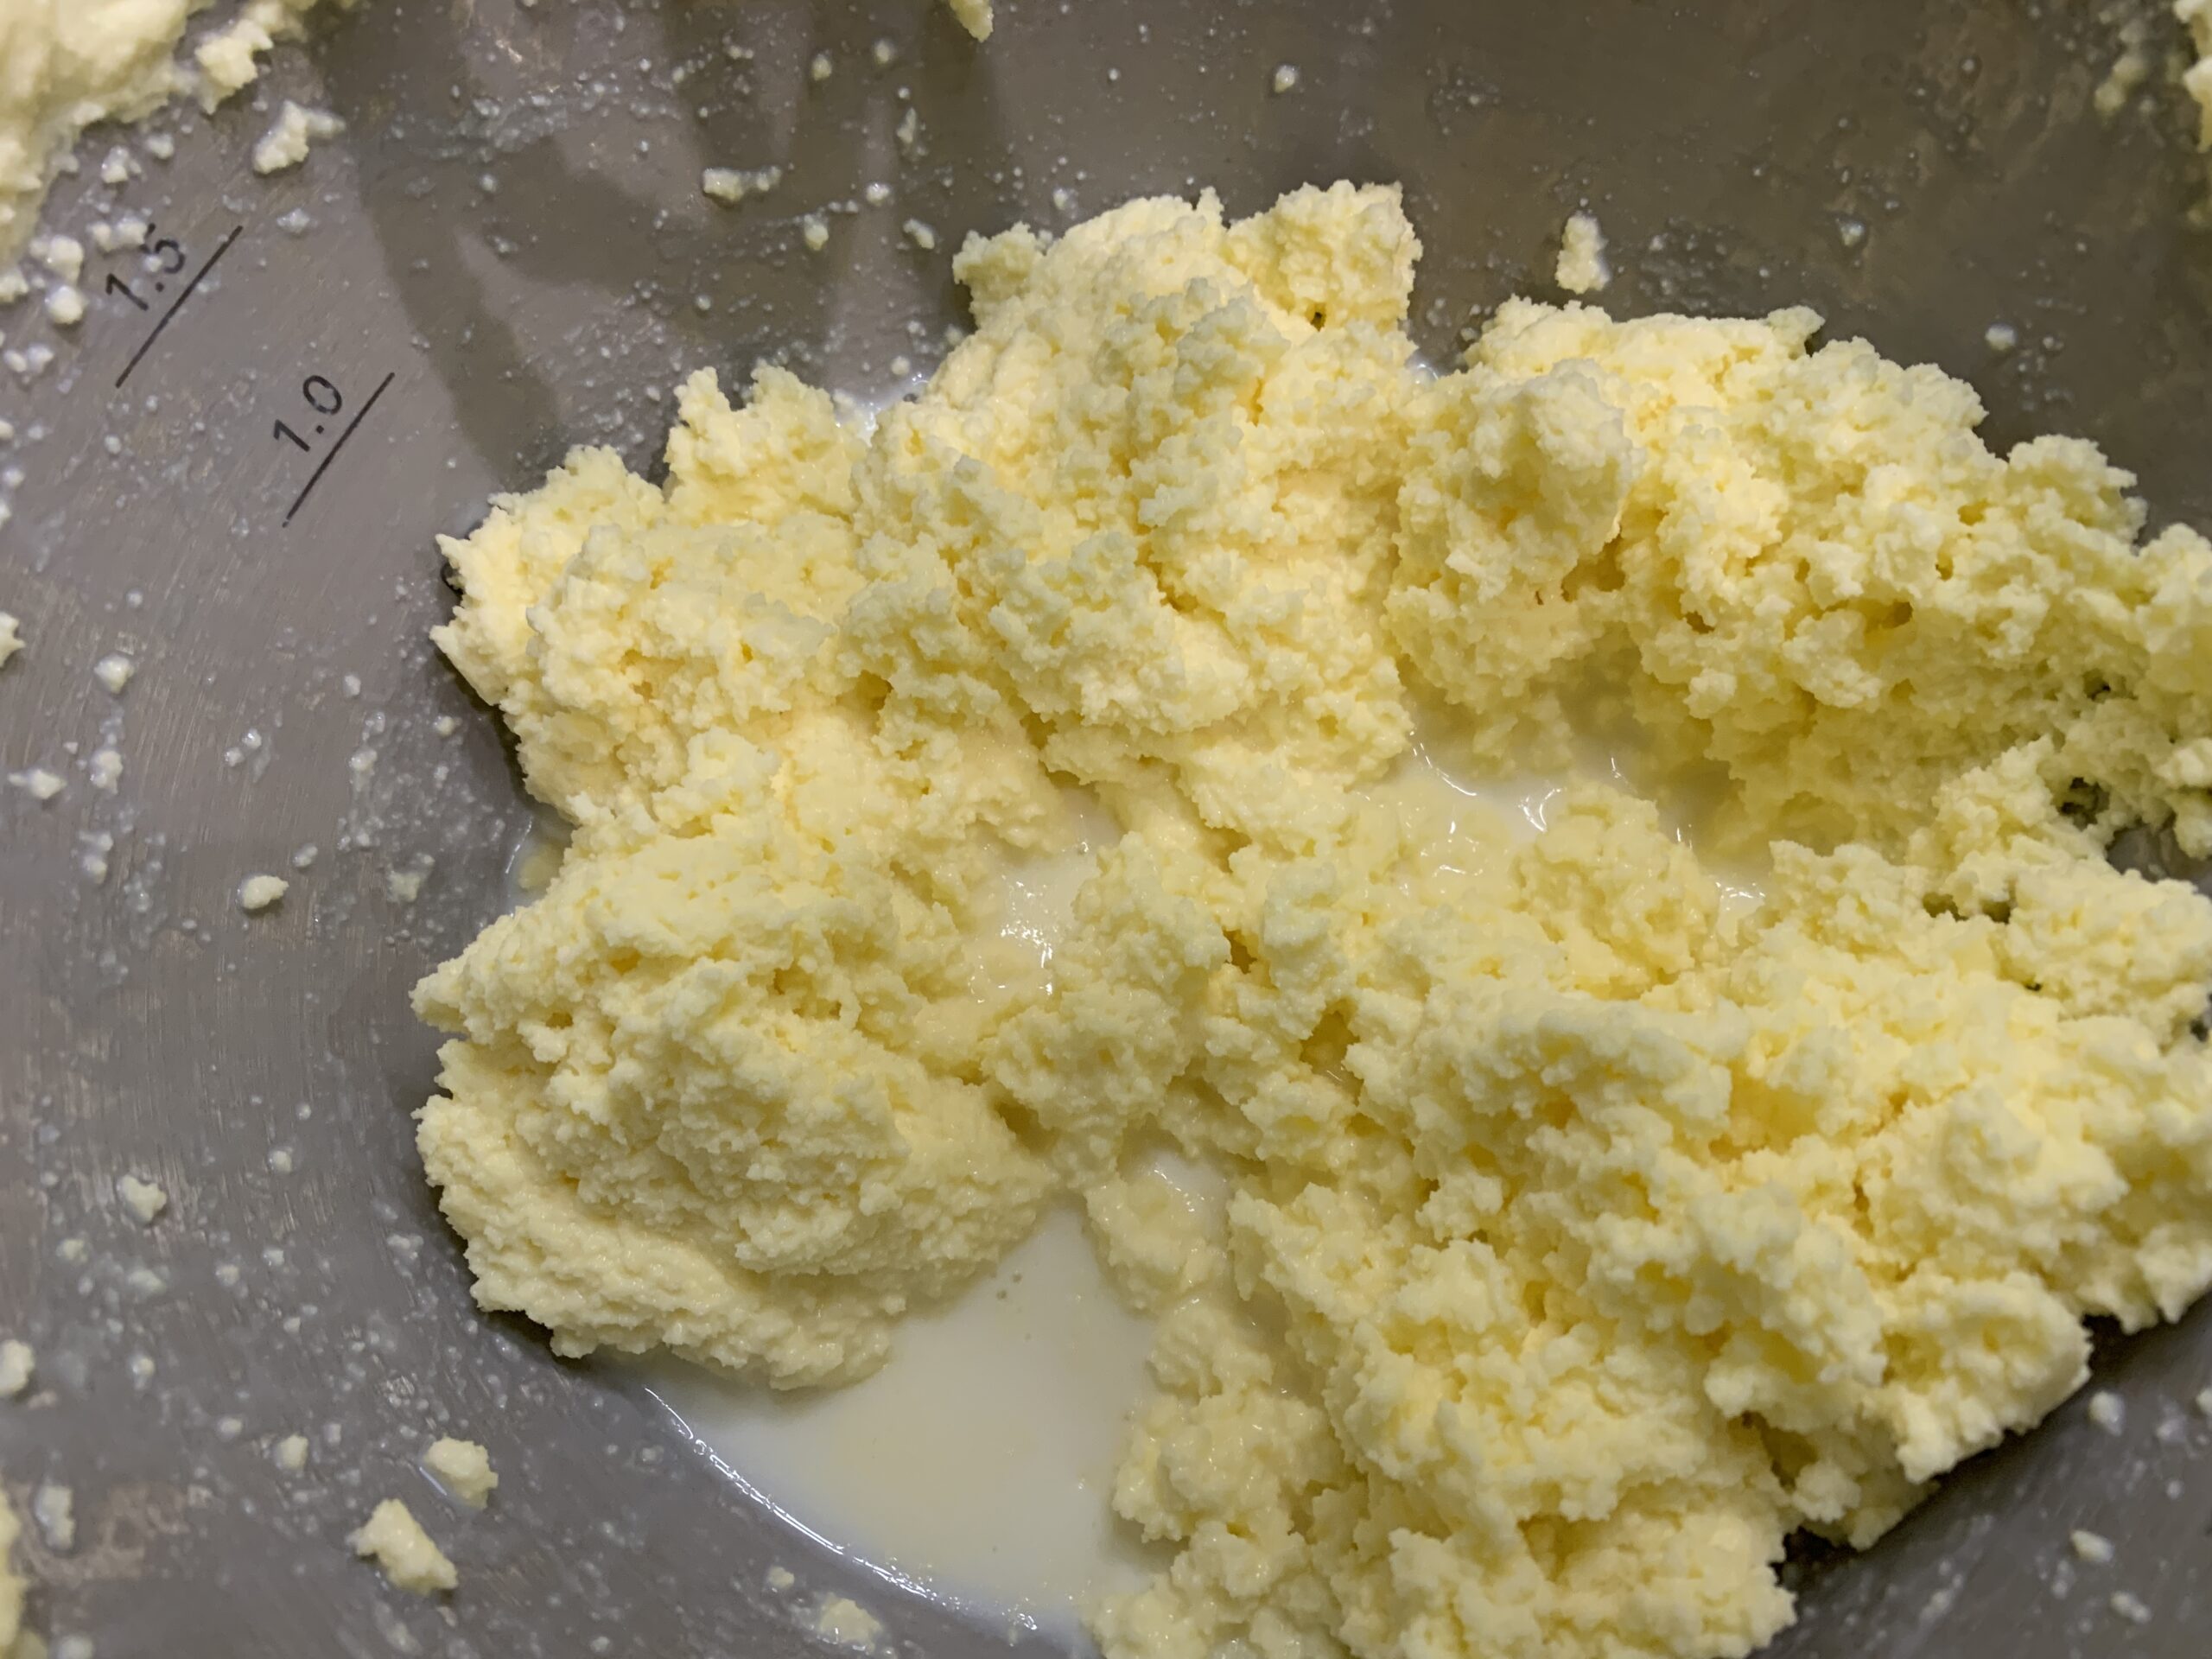
Once the butter has solidified, place a sieve over a bowl and pour in the contents of the bowl. Squeeze the butter solids in your hands to drain all the buttermilk. If you want, you can squeeze it in a clean tea towel or a cheesecloth.
Optional- if you want you can add salt to the butter.
Homemade butter is ready to be served!