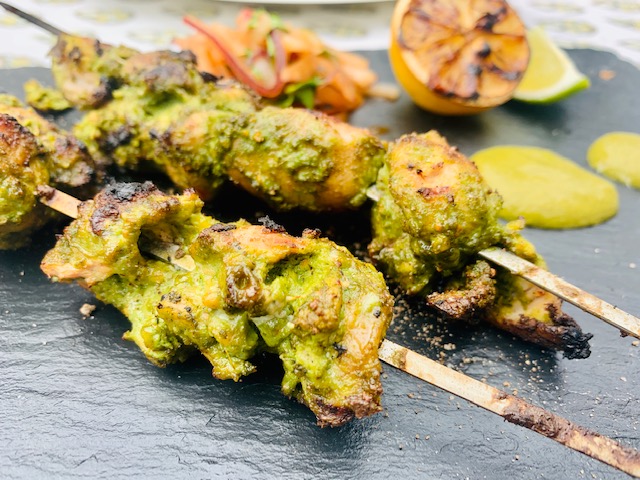
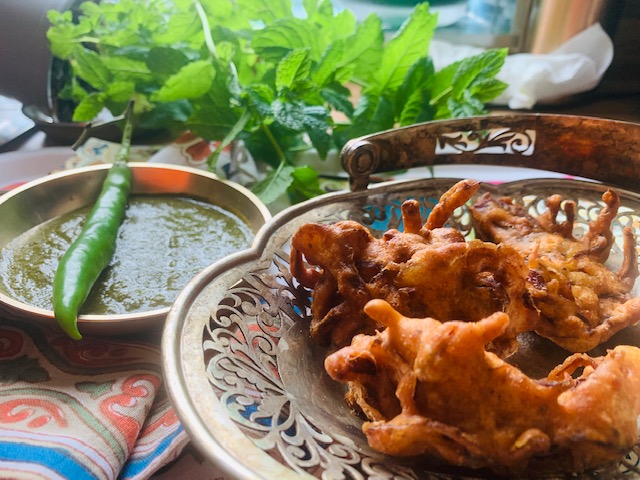
Hariyali Chicken Tikka
Hariyali Chicken Tikka is a classic North Indian starter where chicken is flavoured with fresh green herbs – mint and coriander leaves along with spices. It is prepared with green masala thus the name “hariyali which means ‘green’ and ‘tikka’ is usually a bite-size grilled piece of food either meat, vegetable, fish or paneer.
My husband loves hariyali chicken tikka! The soft succulent chicken and the deep green colour with layers of flavour is out of this world. I had recently prepared this for a friends’ farewell party, and he said, “this chicken tikka is as soft as butter”. What else can one ask for when friends and family are happy with the food you cook!
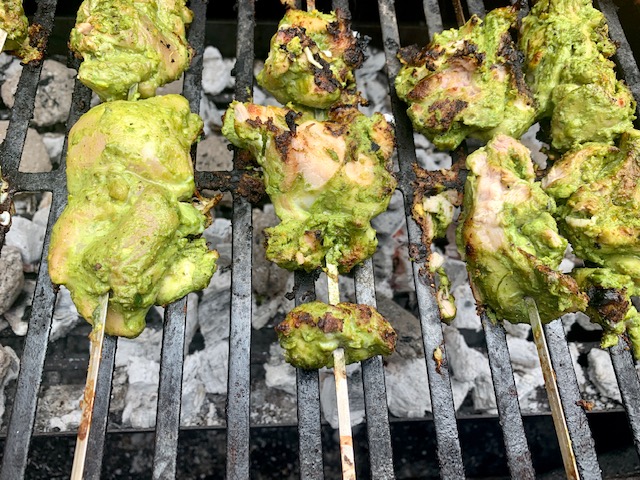
Tikka’s are best cooked on metal skewers. The meat cooks not only from the heat of the coals but also from the hot skewers and that produces tender and juicy pieces of tikka.
It is imperative to marinate the chicken for a long period of time to develop deep flavours. The hariyali chicken can be made on regular pan, on grill pan, in oven or over barbecue. If you plan to make it in the oven or grill pan, I have written some tips on how to give the tikka’s smoky BBQ flavour. This is a remarkably simple recipe that requires very few ingredients and hence easy to prepare.
The most important part of any ‘Tikka’ items is the marinate. If you give time and love in preparation of the marinate- the results will be delicious. An ingredients here and there makes a huge difference in how the marination works. People often question me about the 3 marinates I make for this dish. Believe me when I say that there is a science behind it all! Put all ingredients together and marinate or marinade in stages gives 2 different results. The way I marinate the chicken helps in building the layers and thus the result is soft melting tikkas!
200 gm chicken thighs (1 inch pieces)
First Marinade
2 tablespoons ginger, garlic, turmeric paste
Second Marinade
½ lime juice
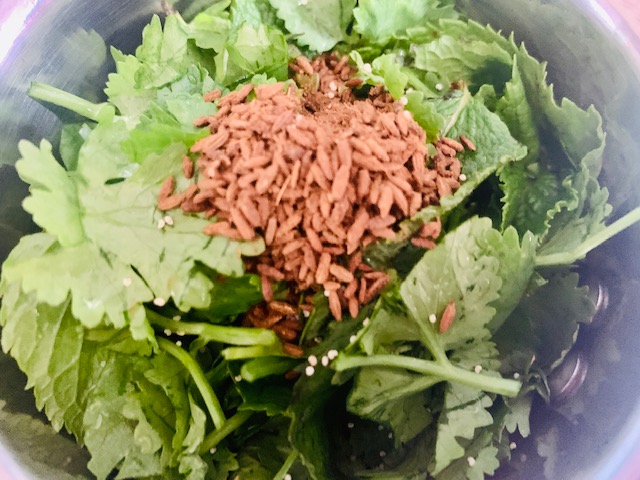
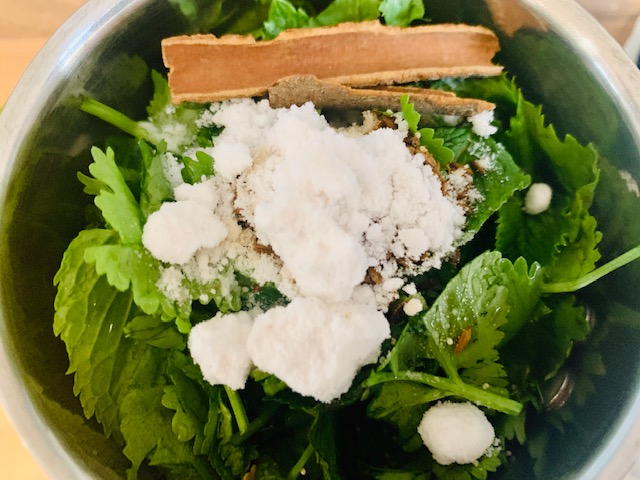
To grind for Third Marinade
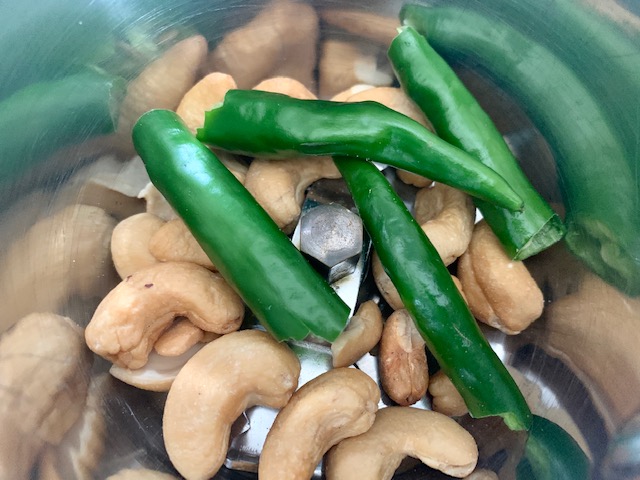
handful unsalted cashew nuts
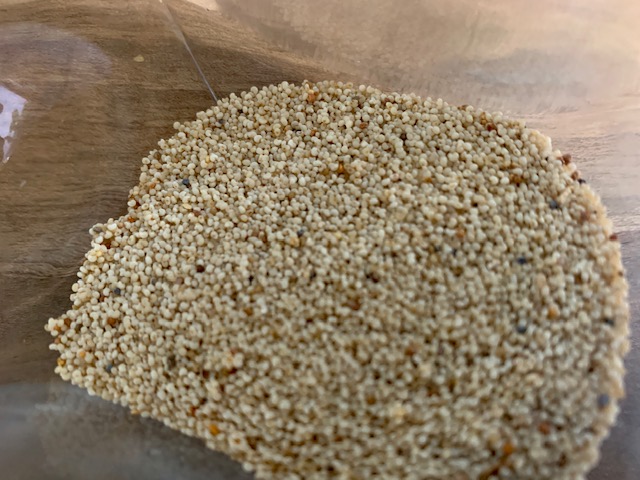
1 tablespoon poppy seeds (khus khus)
2-3 green chillies (medium to hot)
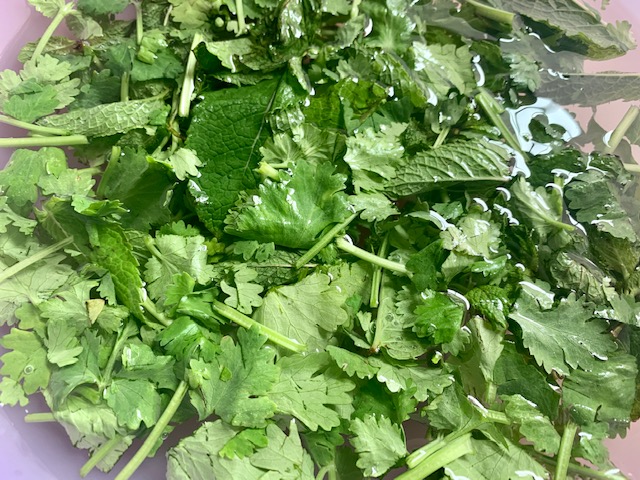
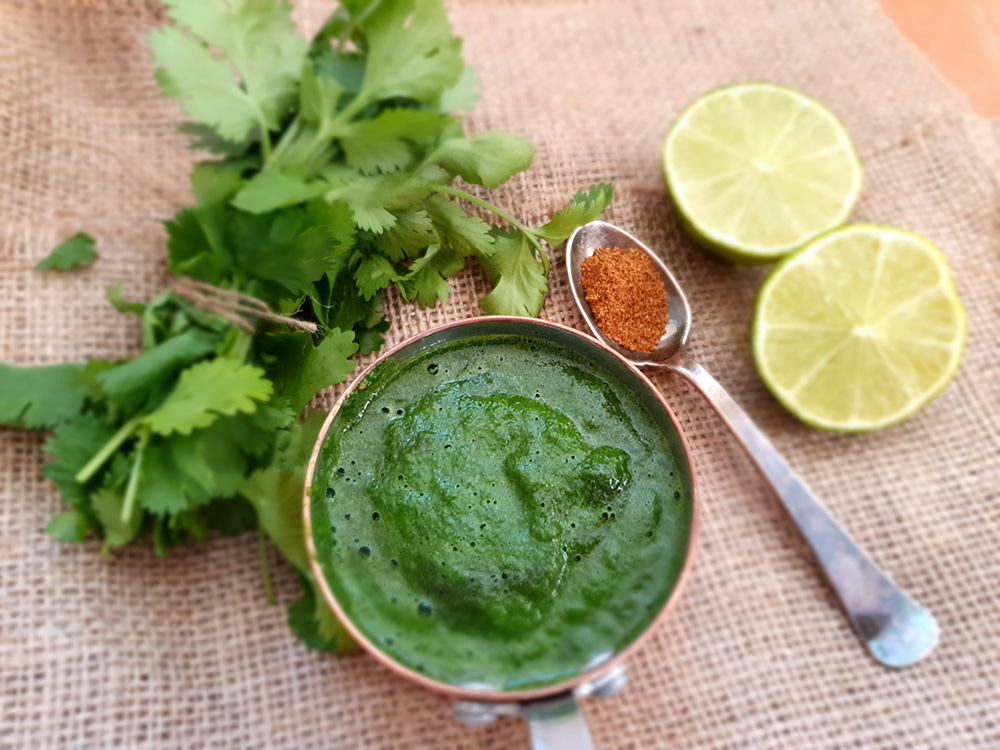
½ cup mint leaves
1 cup fresh coriander
1 teaspoon cumin seeds
1-inch cinnamon stick
Salt to taste
Other Ingredients
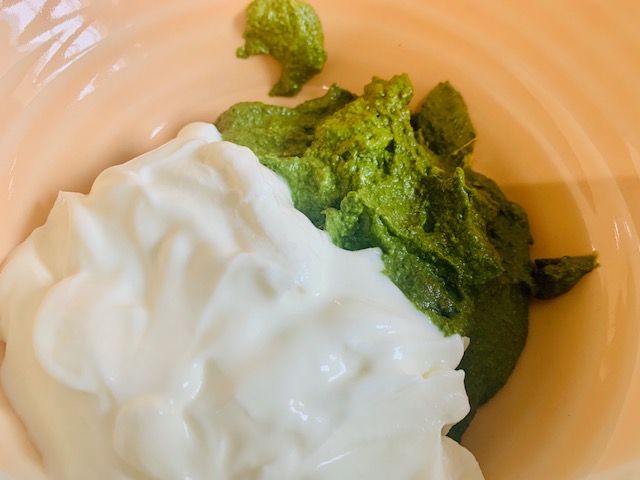
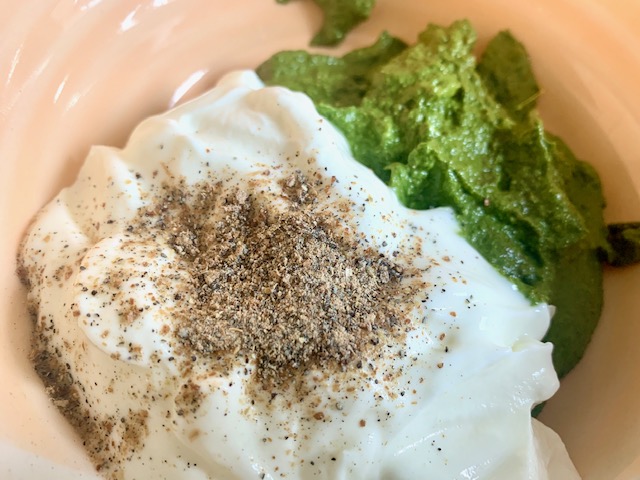
2 tablespoons plain yogurt
1 teaspoon cardamom powder (elaichi)
Directions
Step-1
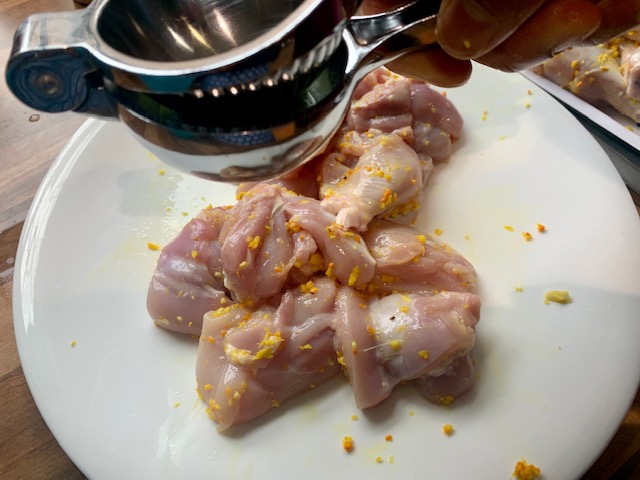
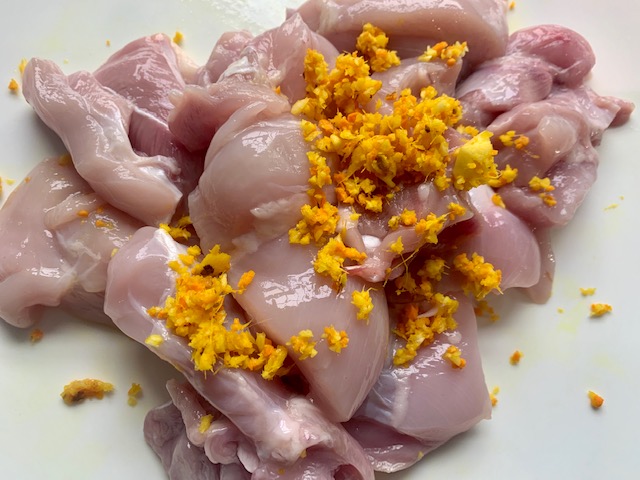
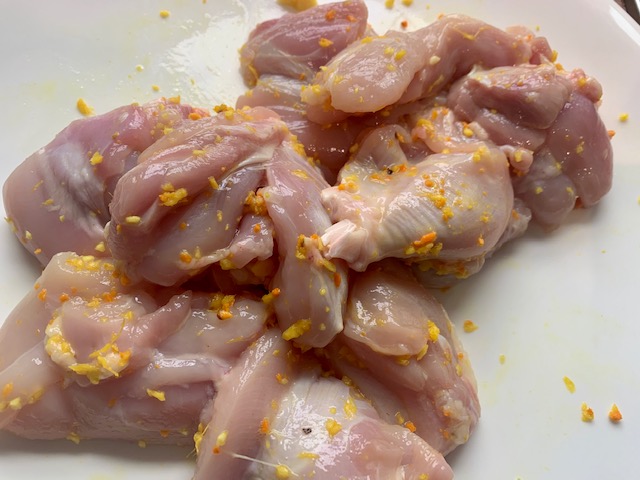
First Marinate
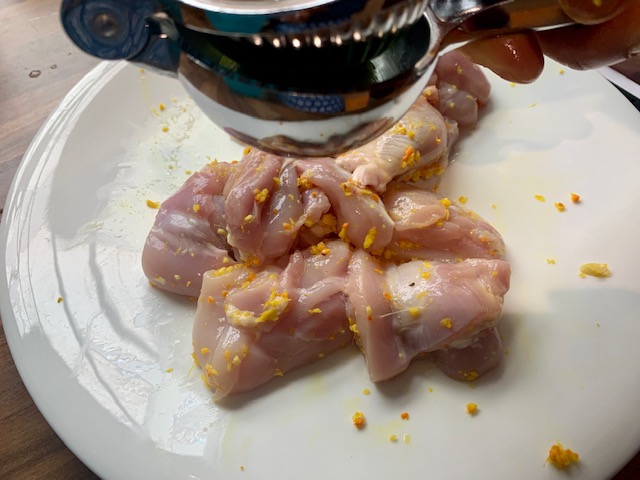
Marinate the clean chicken tikka pieces in ginger, garlic, turmeric paste and leave it aside for 10-15 minutes.
Step-2
Second Marinate
Next add lime juice and mix it well coating the chicken with the lime juice and leave it aside for another 10 minutes.
Step-3
Grind all the ingredients for third marinade into a fine paste.
Mix yogurt, cardamom powder and the marinade paste together. Taste to check the spicing as the marinade needs to be slightly hot.
Step-4
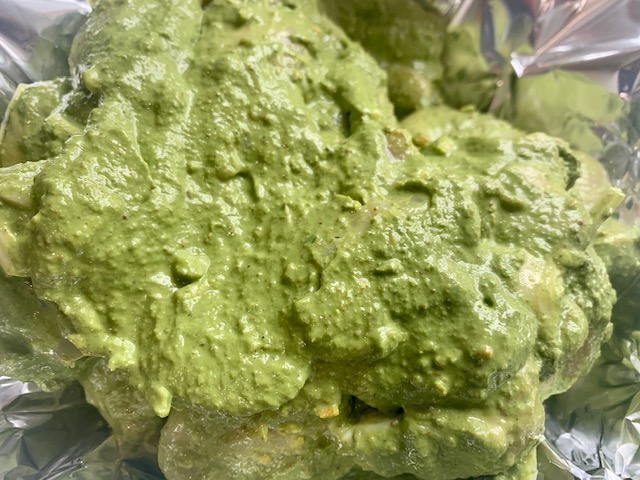
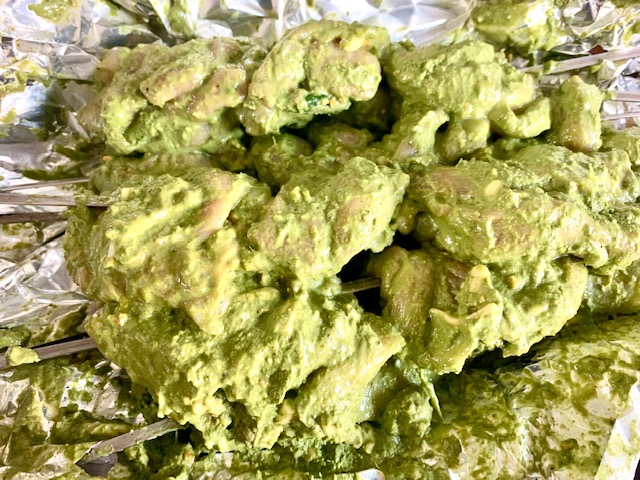
Add the green marinade to the chicken pieces and rub it gently coating all the tikkas. Cover and keep aside for at least 4-5 hours or preferably overnight.
Step-5
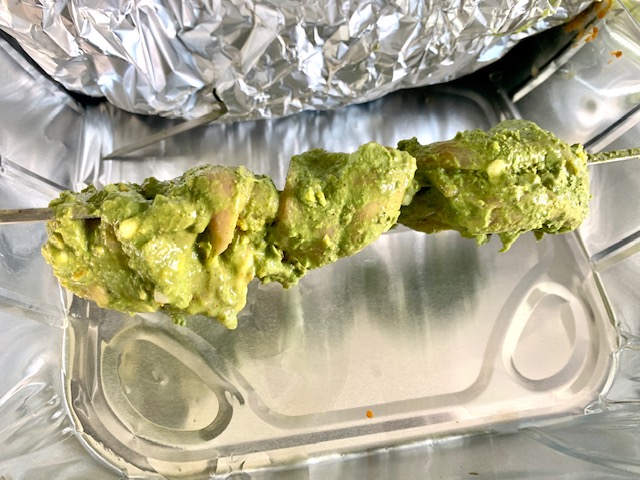
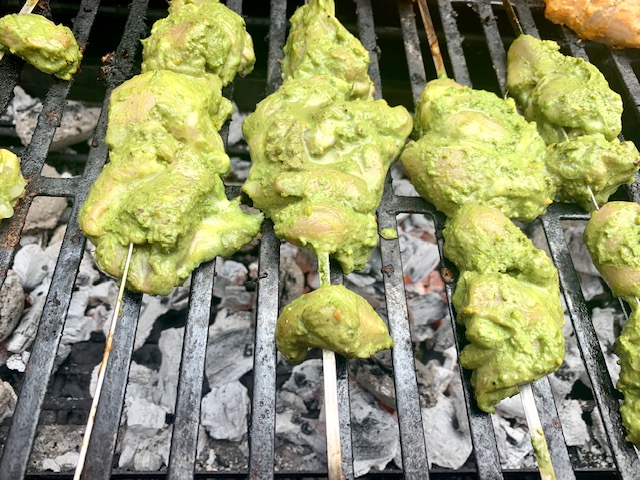
Light the charcoal until white hot. Skewer the chicken pieces.
Gently place the skewered tikkas over the hot coals. Be sure to rotate the skewers regularly so that the chicken chars on the exterior and cooks evenly through. It takes around 6-8 minutes to cook the tikka.You can baste the chicken with some oil while cooking.
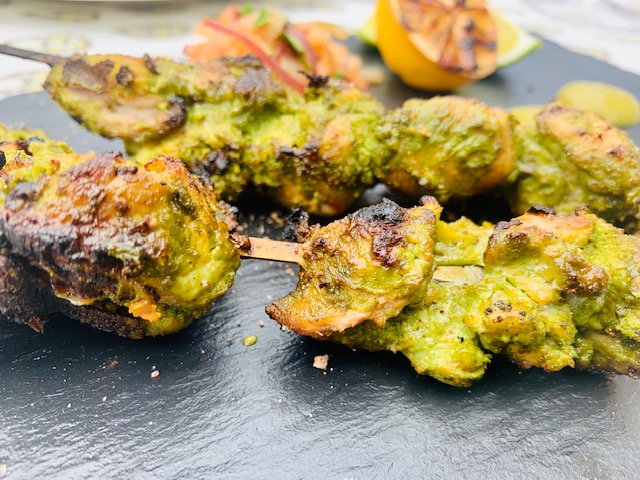
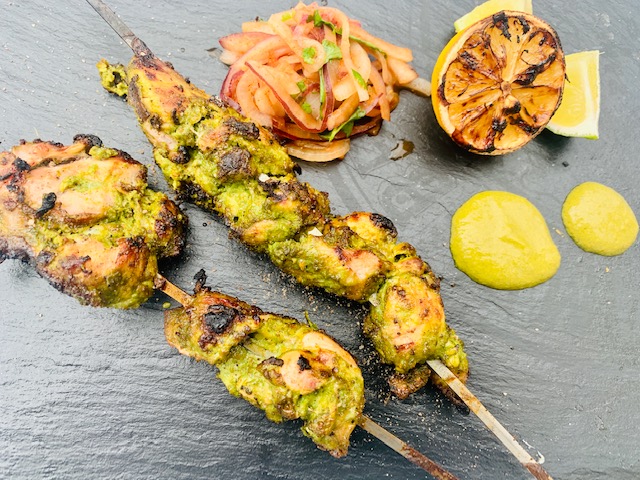
Drizzle with some chaat masala and lime juice and serve hot.
Tips & Variations
- Boneless chicken thigh gives a more tender and moist texture to the tikka however you can use chicken breast or drumsticks as well.
- Marinating the chicken is particularly important to build the layers of flavour hence it requires some patience. I usually start with the first marinade and while the chicken is marinating, I prepare the paste for the third marinade.
- While preparing the first marinade I have added some fresh turmeric with the ginger and garlic as that will give a mellow earthy flavour to the tikka.
There might be some excess water while marinating the chicken especially the first and second marinade. Always drain it off otherwise the marinade will become watery.
- Only use fresh mint and coriander for this recipe as it gives a lovely fresh taste.
It is always better to keep the quantity of mint leaves less as compared to the coriander leaves as the mint leaves have more intense flavours and can overpower the taste of coriander and chicken.
- Make sure to adjust the quantity of chilli according to the variety of chilli you use and your taste. Remember you can add more but cannot take it away. You can always grind a couple of green chilies, taste and then add more if needed.
- If you do not have cashews, then you can add either some peeled almonds or pine nuts. The taste will be slightly different but still taste delicious.
- The good thing about adding cashew is that the marinade gets a creamy texture and gives a rich flavour to the tikka.
- If you are allergic to nuts, then the marinade paste can be made without adding any nuts. I would suggest using 2 tablespoons of thick cream alongside the hung yogurt to give it a rich flavour.
- I would highly recommend using poppy seeds. I have experimented making it using it and the result is not as great! Khus Khus not only acts as a thickening agent it also gives a texture and flavour to the dish.
- I always use hung curd to marinate any tikka’s as there is no excess liquid or water and as a result the tikkas are moist and succulent and absorbs the spices better. For making hung curd the easiest way is to place 3 to 4 tablespoons of yogurt in a strainer for 30 minutes. When most of the water drains out, the yogurt is now ready to be used in the marination. It usually takes 2-3 hours.
- Minimum time for marinating is 4-5 hours but it is always better to marinate overnight for the spices to infuse in the chicken.
- You can use frozen chicken too. Thaw it according to the packaging and then follow the steps.
- I would suggest using metal skewers for even cooking. However, you can use wooden skewers too. Soak the wooden skewers in water for 3-4 hours especially if you plan to grill on barbecue as soaked skewers do not catch fire.
- Cooking in Pan- You can cook tikka skewers on a cast iron grill pan or a normal frying pan. Heat a pan and drizzle some oil. Cook the skewers from all sides until cooked and slightly charred. After cooking, you can smoke the tikka with hot charcoal for the BBQ grilled tikka aroma and flavours.
- Cooking in oven- If you wish to bake haryali chicken tikka, just spread the marinated chicken tikka on a baking dish and cook for 10-15 minutes in a preheated oven at 250C/475F/Gas 9. Flip the tikka after 7 minutes for even baking.
- Rotating the skewered chicken often causes problems for beginners. The most common problem is that the chicken is skewered directly on the stick and when they placed over the coals the meat slides with the skewer while flipping making it difficult to evenly cook the tikka. Hence, it is important to weave the skewer though the meat. This keeps the chicken tikka secure so that it does not slide.
- If you are cooking the tikka in oven or pan, then I would highly recommend that you smoke the chicken tikka to elevate the flavours and aroma. Heat a piece of charcoal over direct heat until it is red hot. With the help of tongs, keep on turning the charcoal piece so that it burns evenly. Make a small bowl using aluminium foil and place it on the chicken platter. Place the hot charcoal in the bowl-shaped foil and pour melted ghee/oil on top of the hot charcoal. You will see smoke coming out of charcoal.
Immediately cover the platter with an aluminium foil and let it remain like this for 2-3 minutes. After 2-3 minutes, remove the charcoal bowl. The longer you keep the lid closed, the smokier the chicken will infuse. Usually 2 minutes is enough, but you can experiment with it based on your taste.
- While smoking it is important that the coal is extremely hot so when ghee/oil is added it smokes.
- Always cover the bowl while smoking so the food gets infused and the smoke does not escape.
- Do not over smoke the food as it will result in an acrid, overpowering flavour that can destroy all other flavours. It is always better to aim for subtlety and remember that as long as smoke comes into contact with food, it will have at least some smoke flavouring.